
Bulk grading a class set
Grading a whole set is the part Zippy is built for. You bring the submissions, Zippy does a first read against your rubric, and you stay in control of every score that goes out. Typed or handwritten, a class of thirty is graded in one pass.
If you have not created a class yet, start with Getting started first.
Here is the flow, from the Grading tab:
- Start a grading activity
- Choose who you are grading
- Add their work
- Import and grade
- Read what Zippy gives you
- Adjust anything, you stay in control
- See the whole class
- Export reports
1. Start a grading activity
From the left rail, open Grading. This is your grading home: it shows what is waiting to grade and what Zippy has already auto-graded. Click Start grading in the top right to begin.
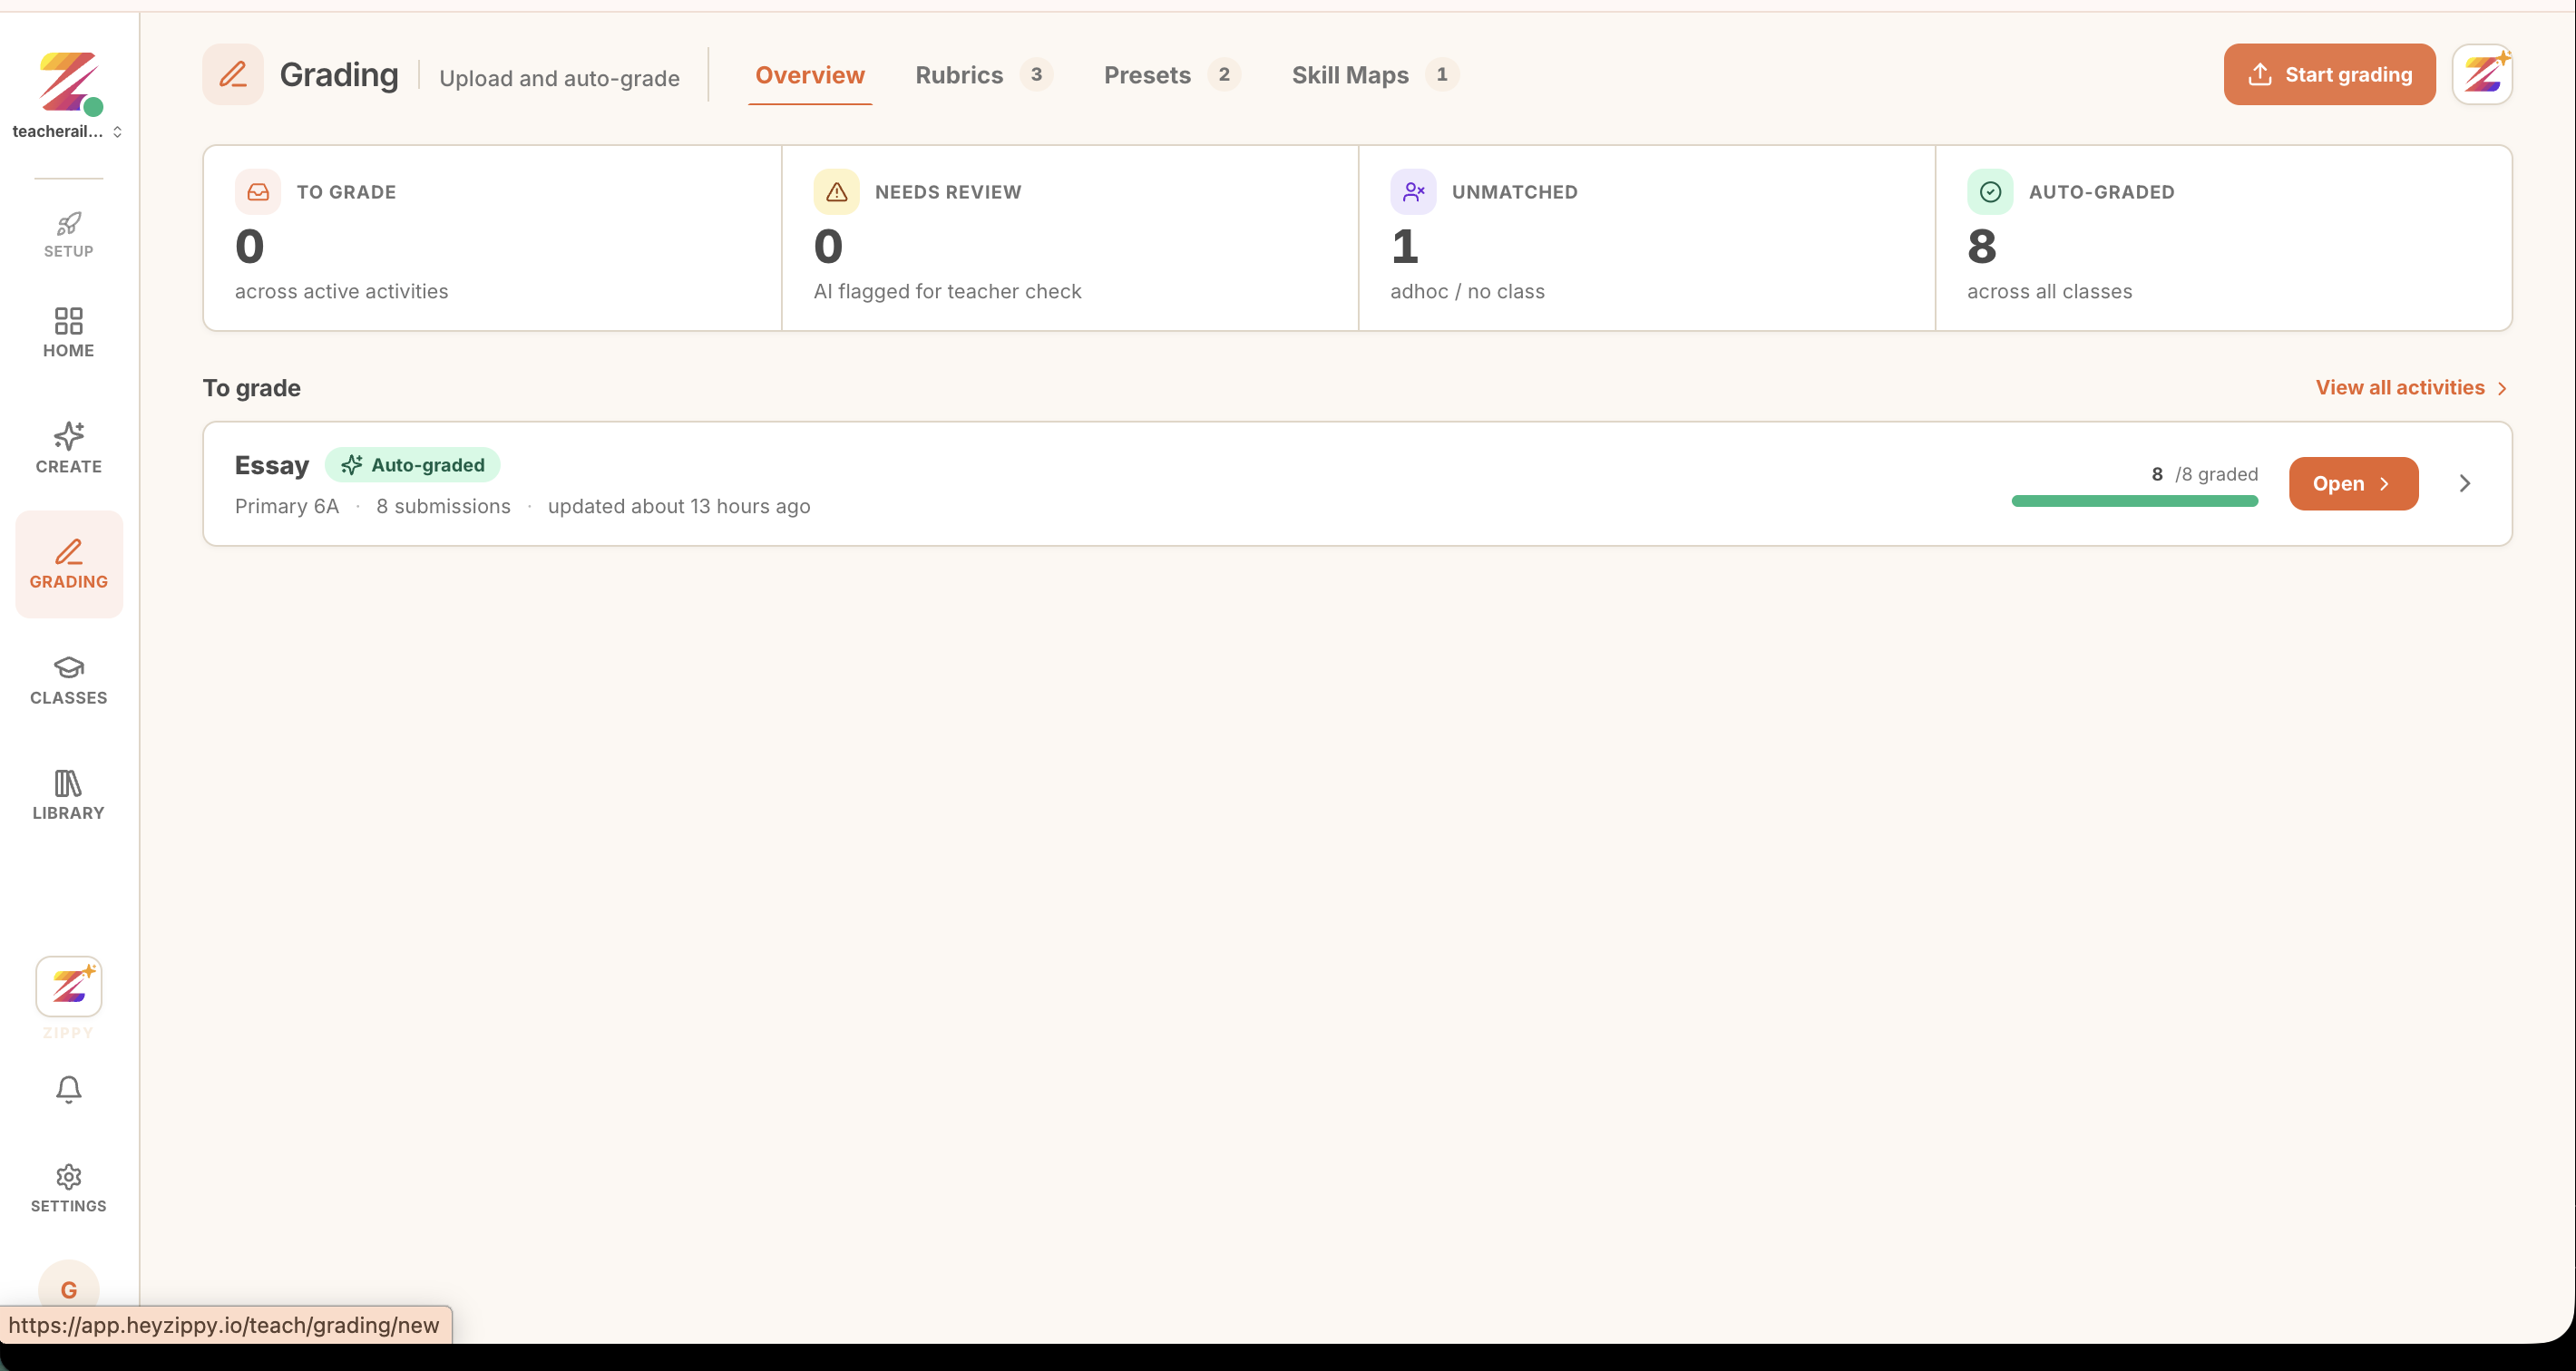 Open Grading from the left rail, then click Start grading.
Give the activity a name, pick the class, and choose Grade your Essays for a single open-ended prompt, or Custom Quiz for a paper with several questions. Type your question, for example "Write a story on a memorable day."
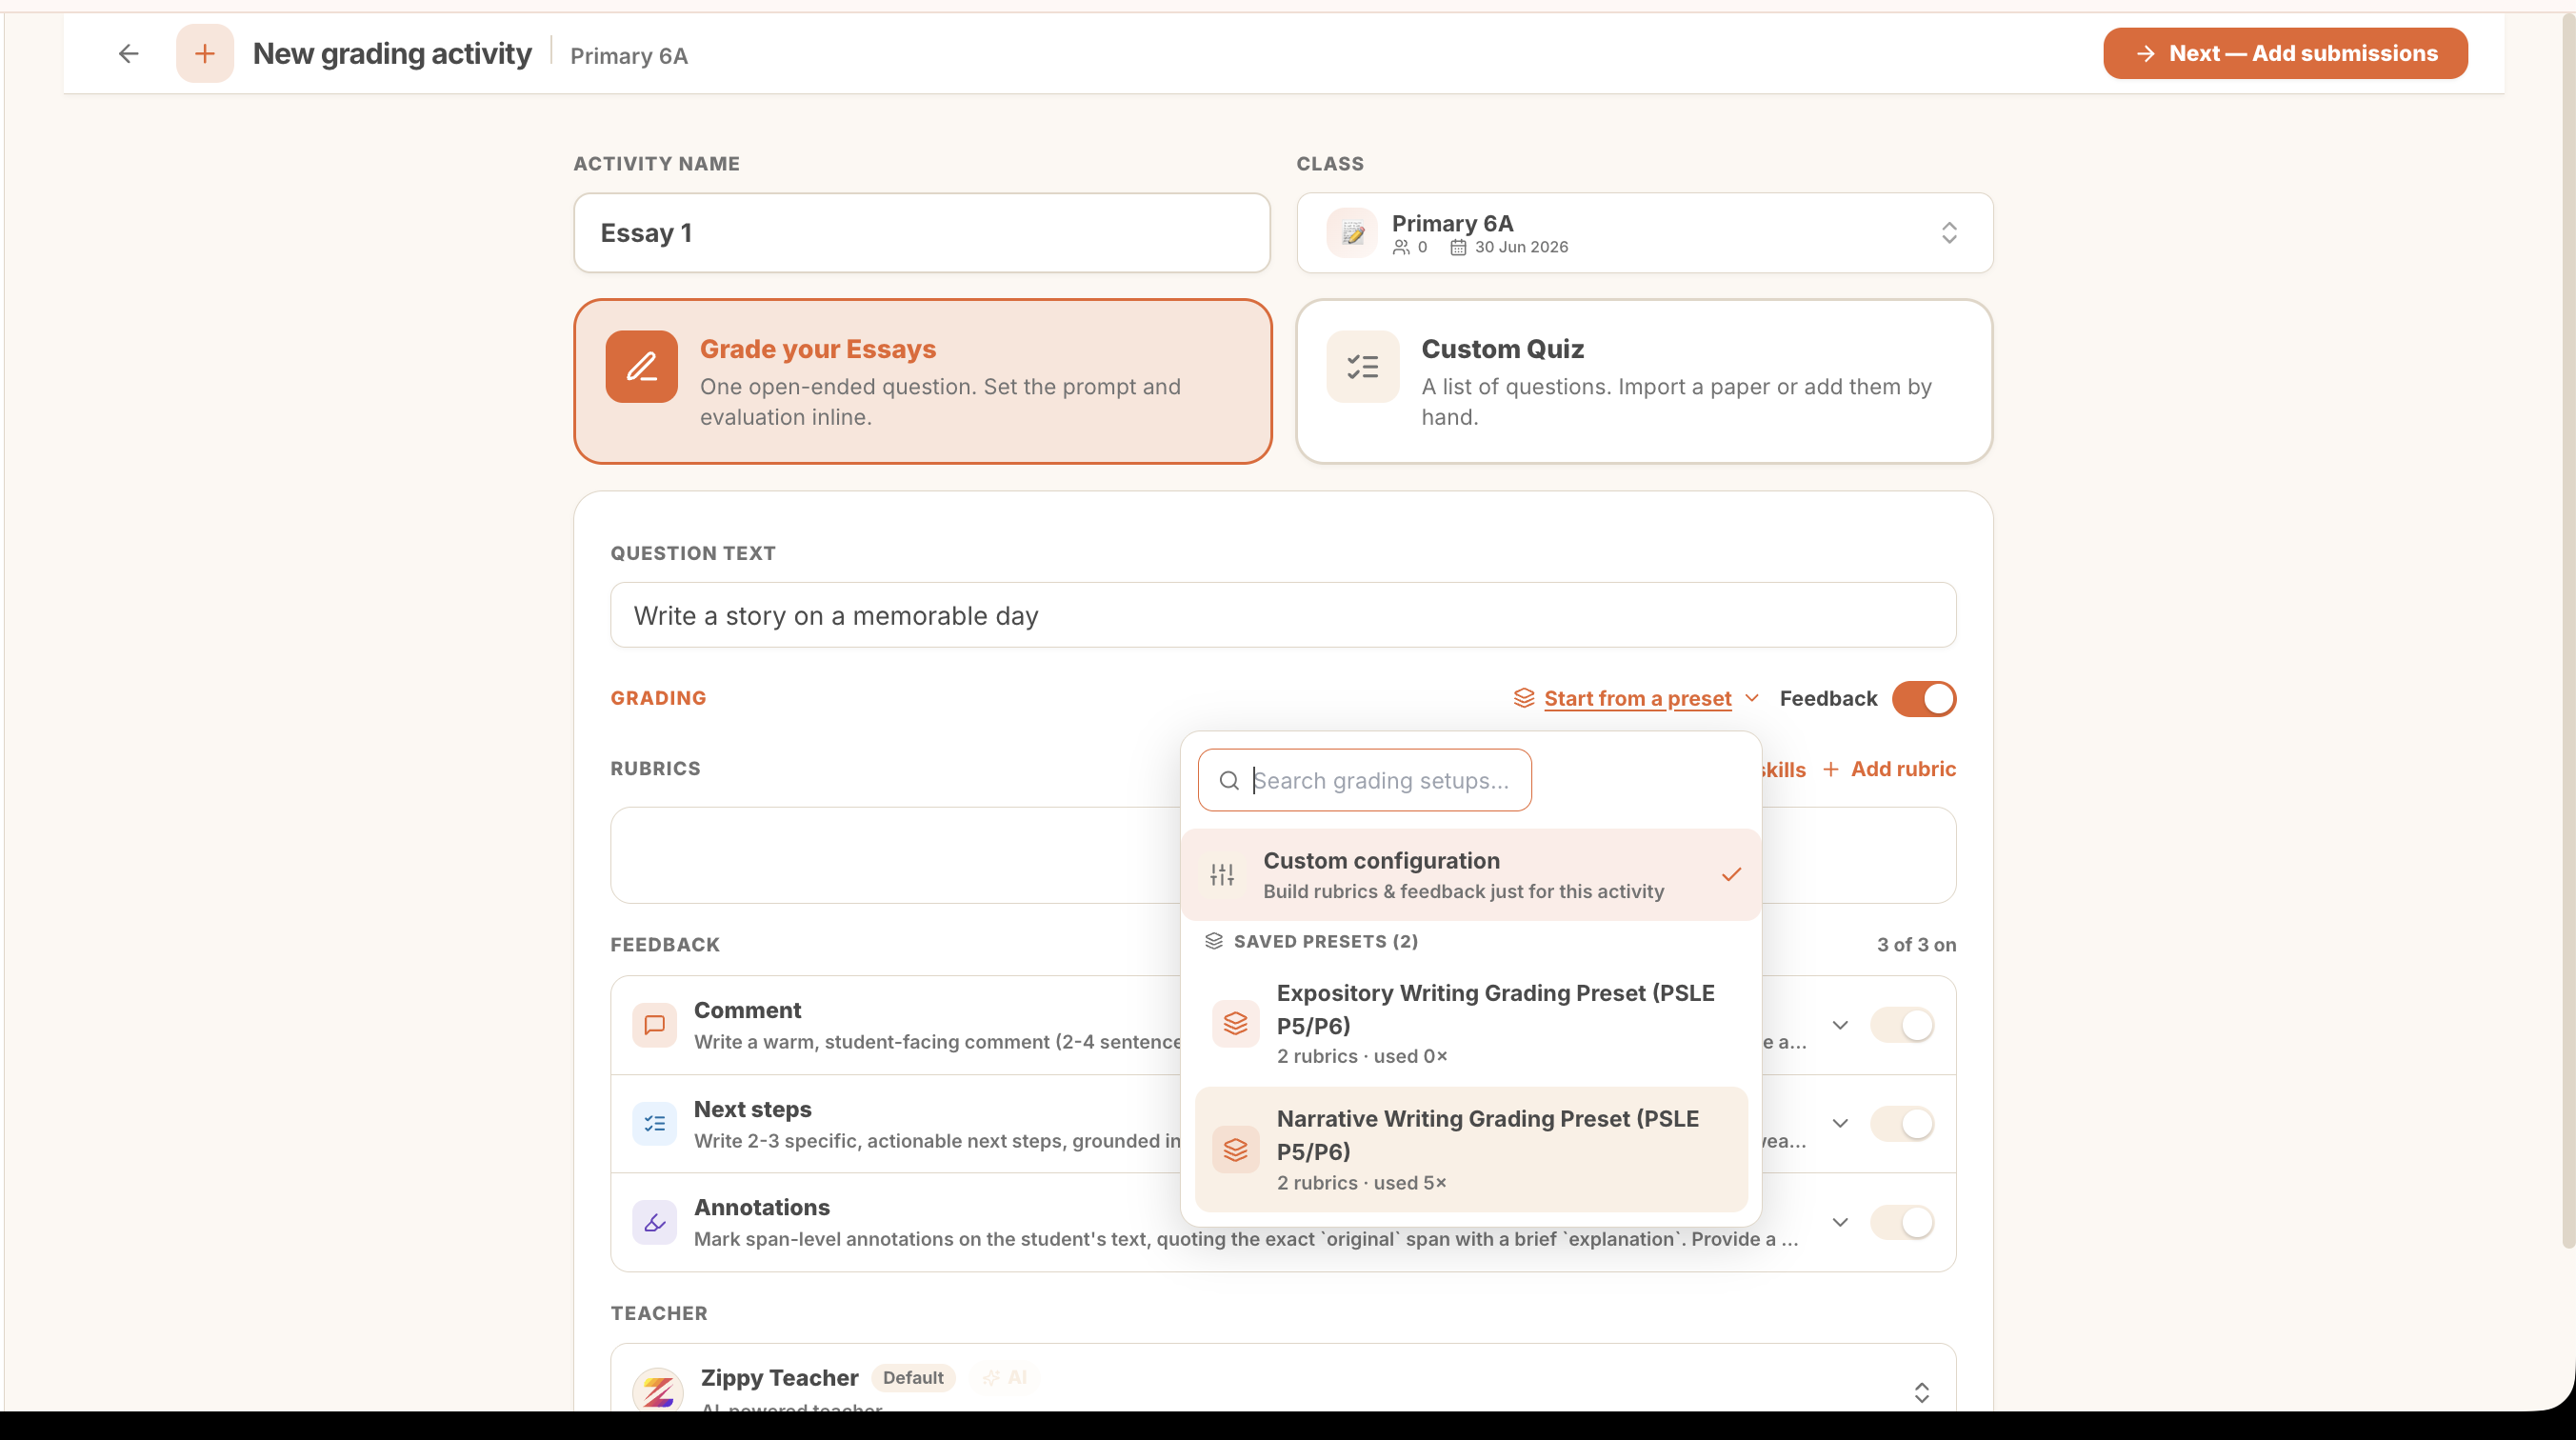 Set the prompt, then choose how Zippy grades. Start from a saved preset, or build a custom rubric for this activity.
Under Grading, you can Start from a preset (like a Narrative or Expository writing rubric) or build your own. Leave Feedback on so Zippy writes a comment, next steps, and annotations for every student. When you are ready, click Next, Add submissions.
2. Choose who you are grading
Pick the students whose work you are grading from your class roster. Use Select all to grade the whole class, or choose a handful.
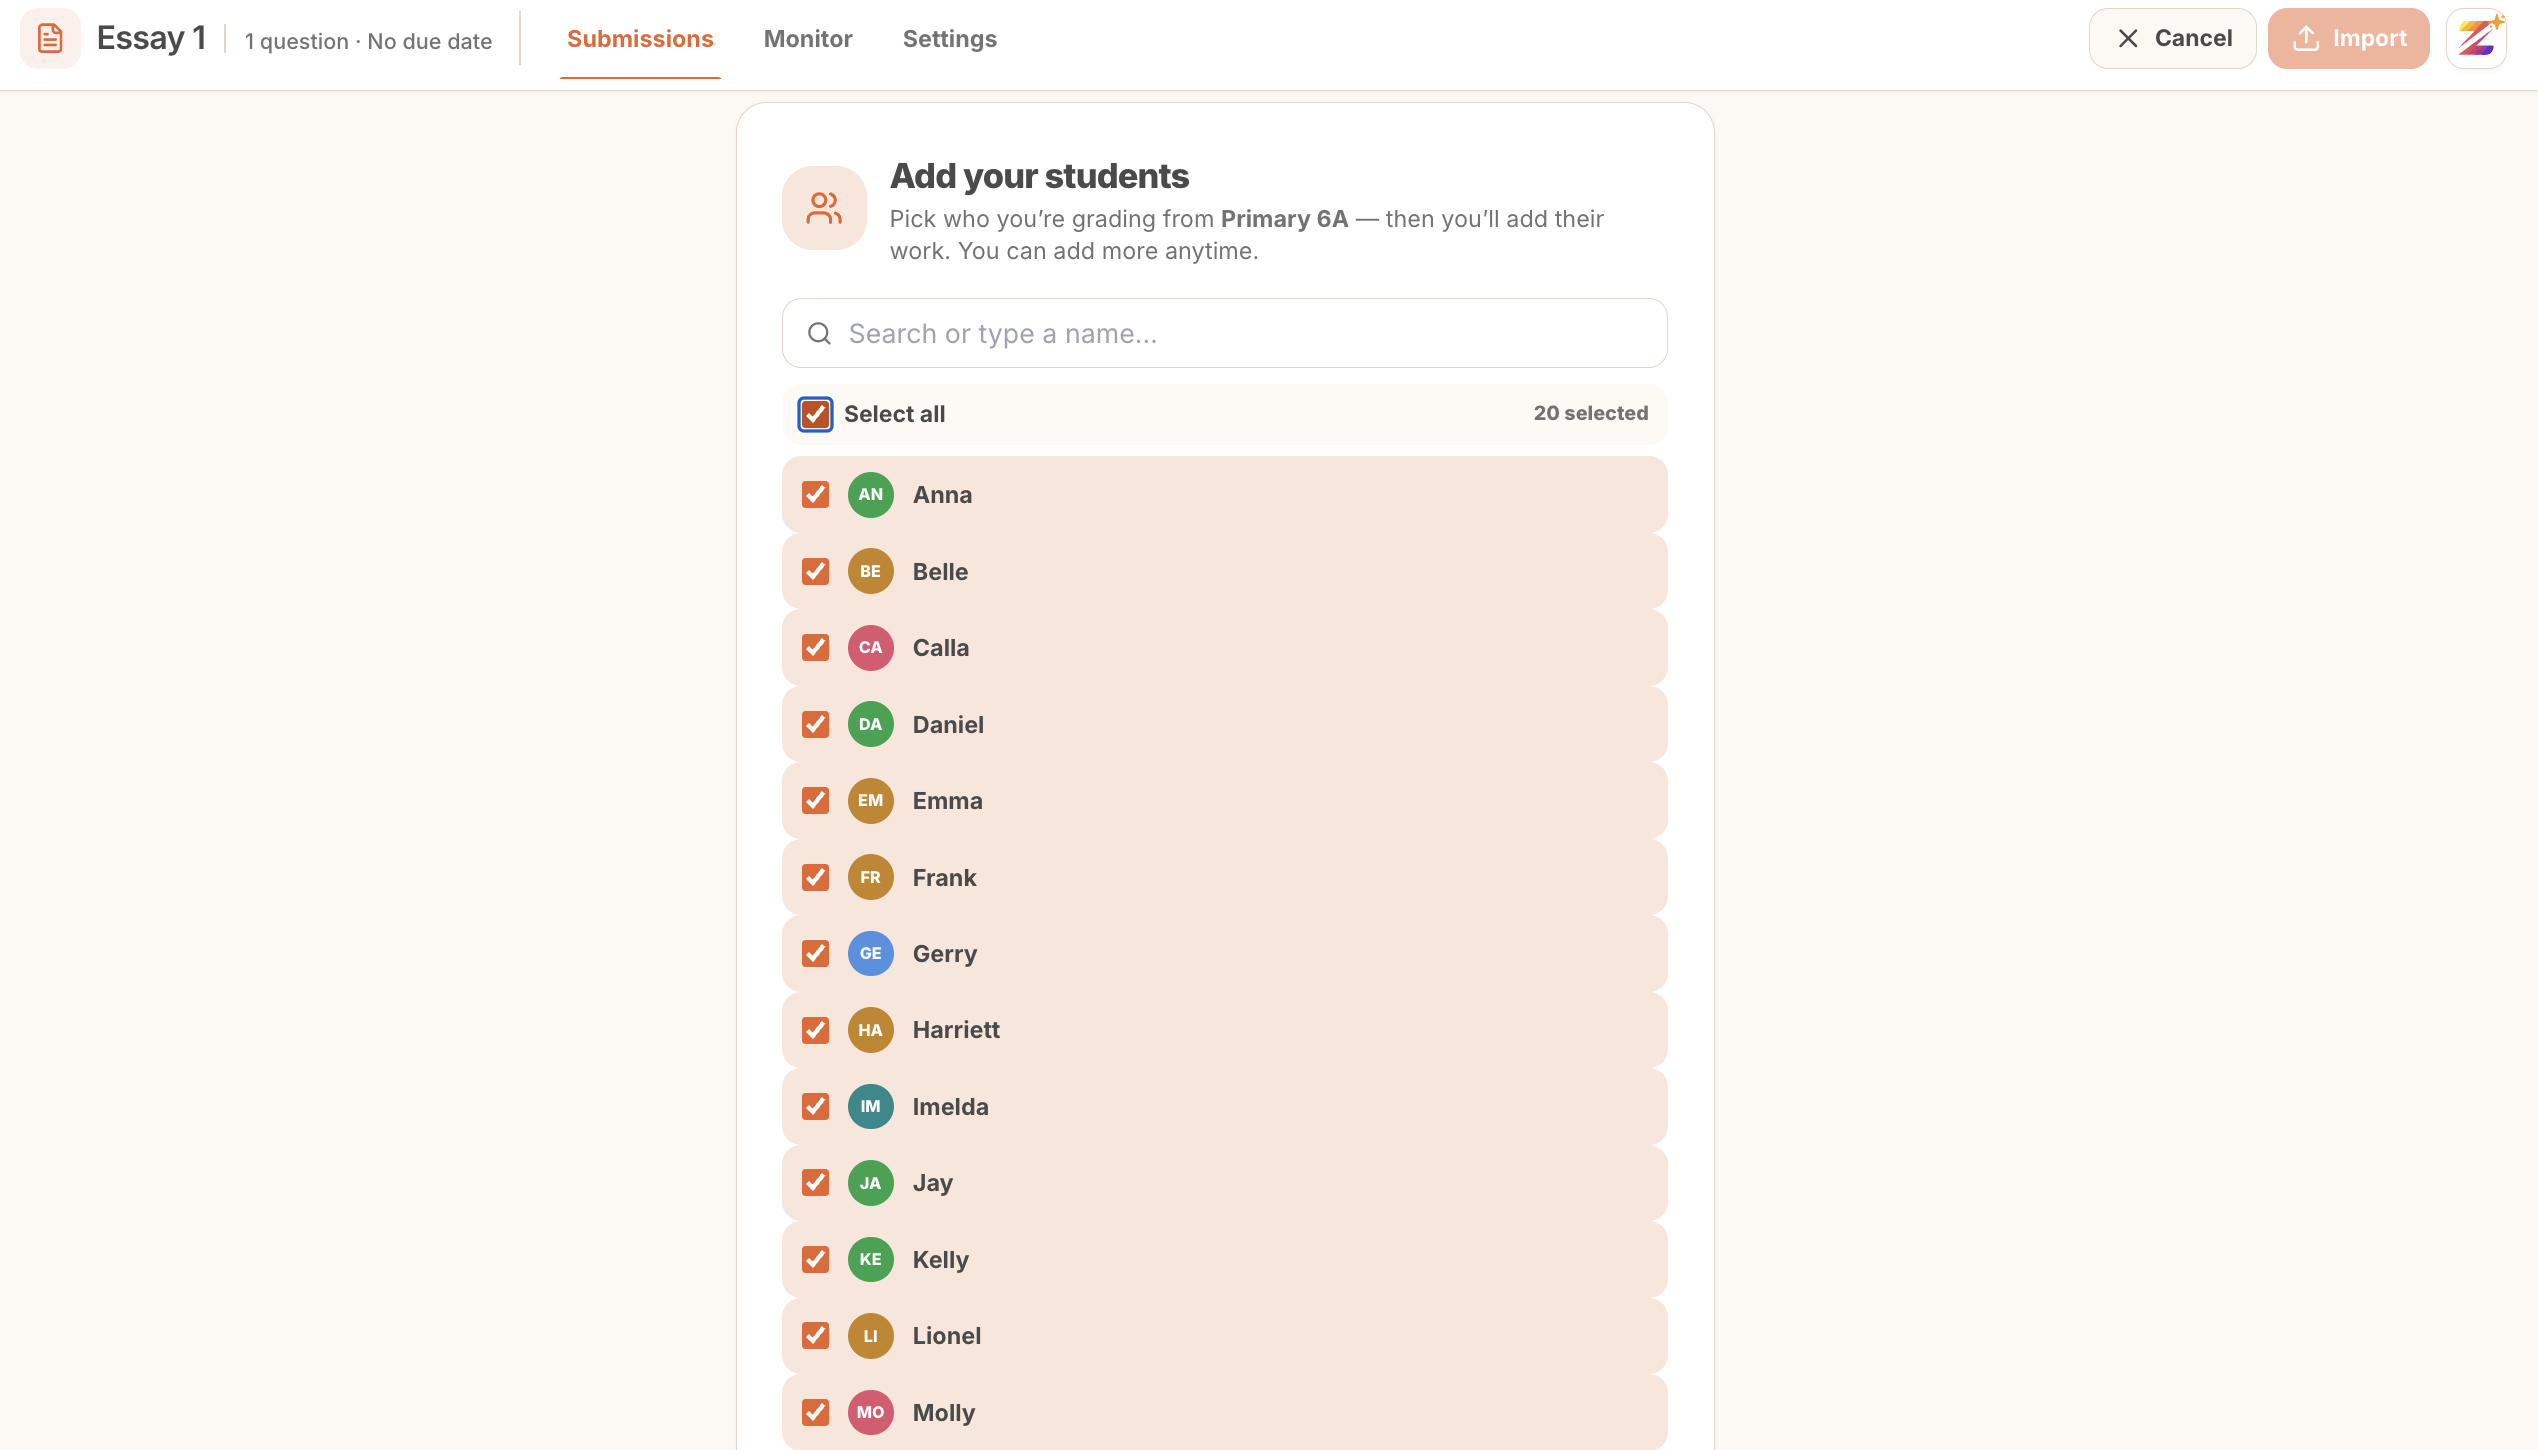 Select the whole class at once, or just the students you need. You can add more anytime.
3. Add their work
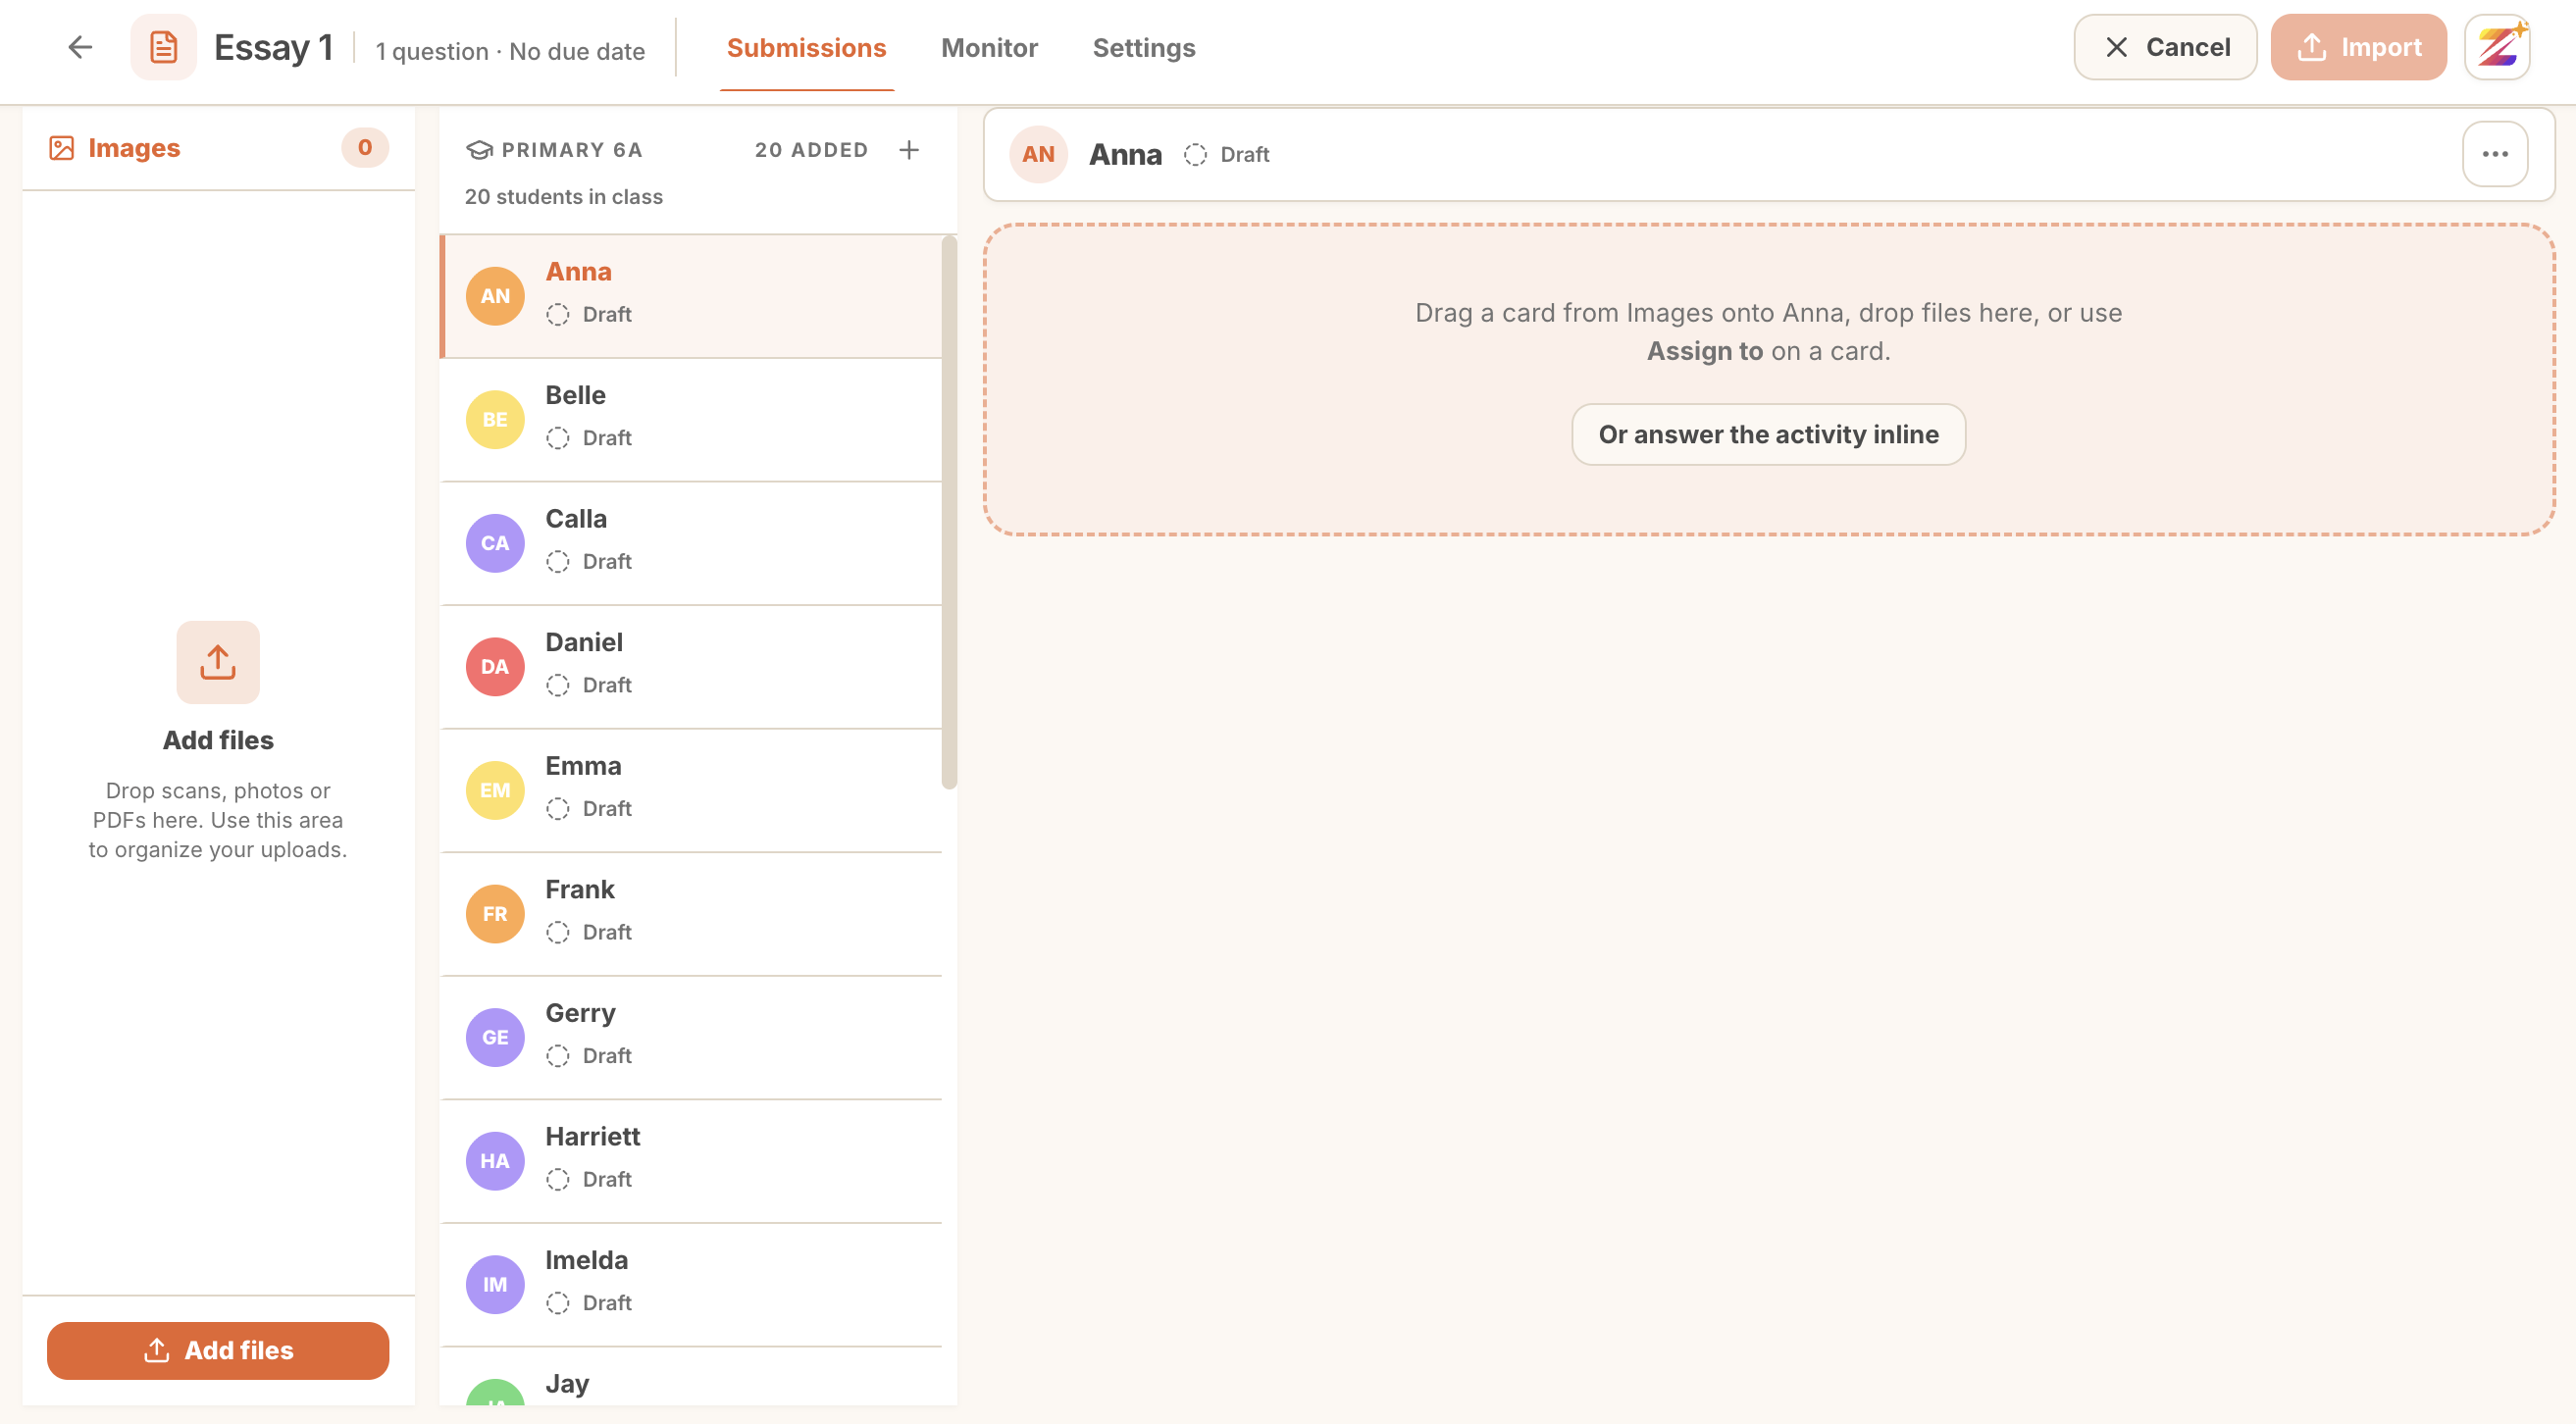
Now attach each student's submission. Drop scans, photos, or PDFs into the Images panel, or click Add files to browse.
 Upload a whole folder of scripts at once. Zippy handles PDFs and photos.
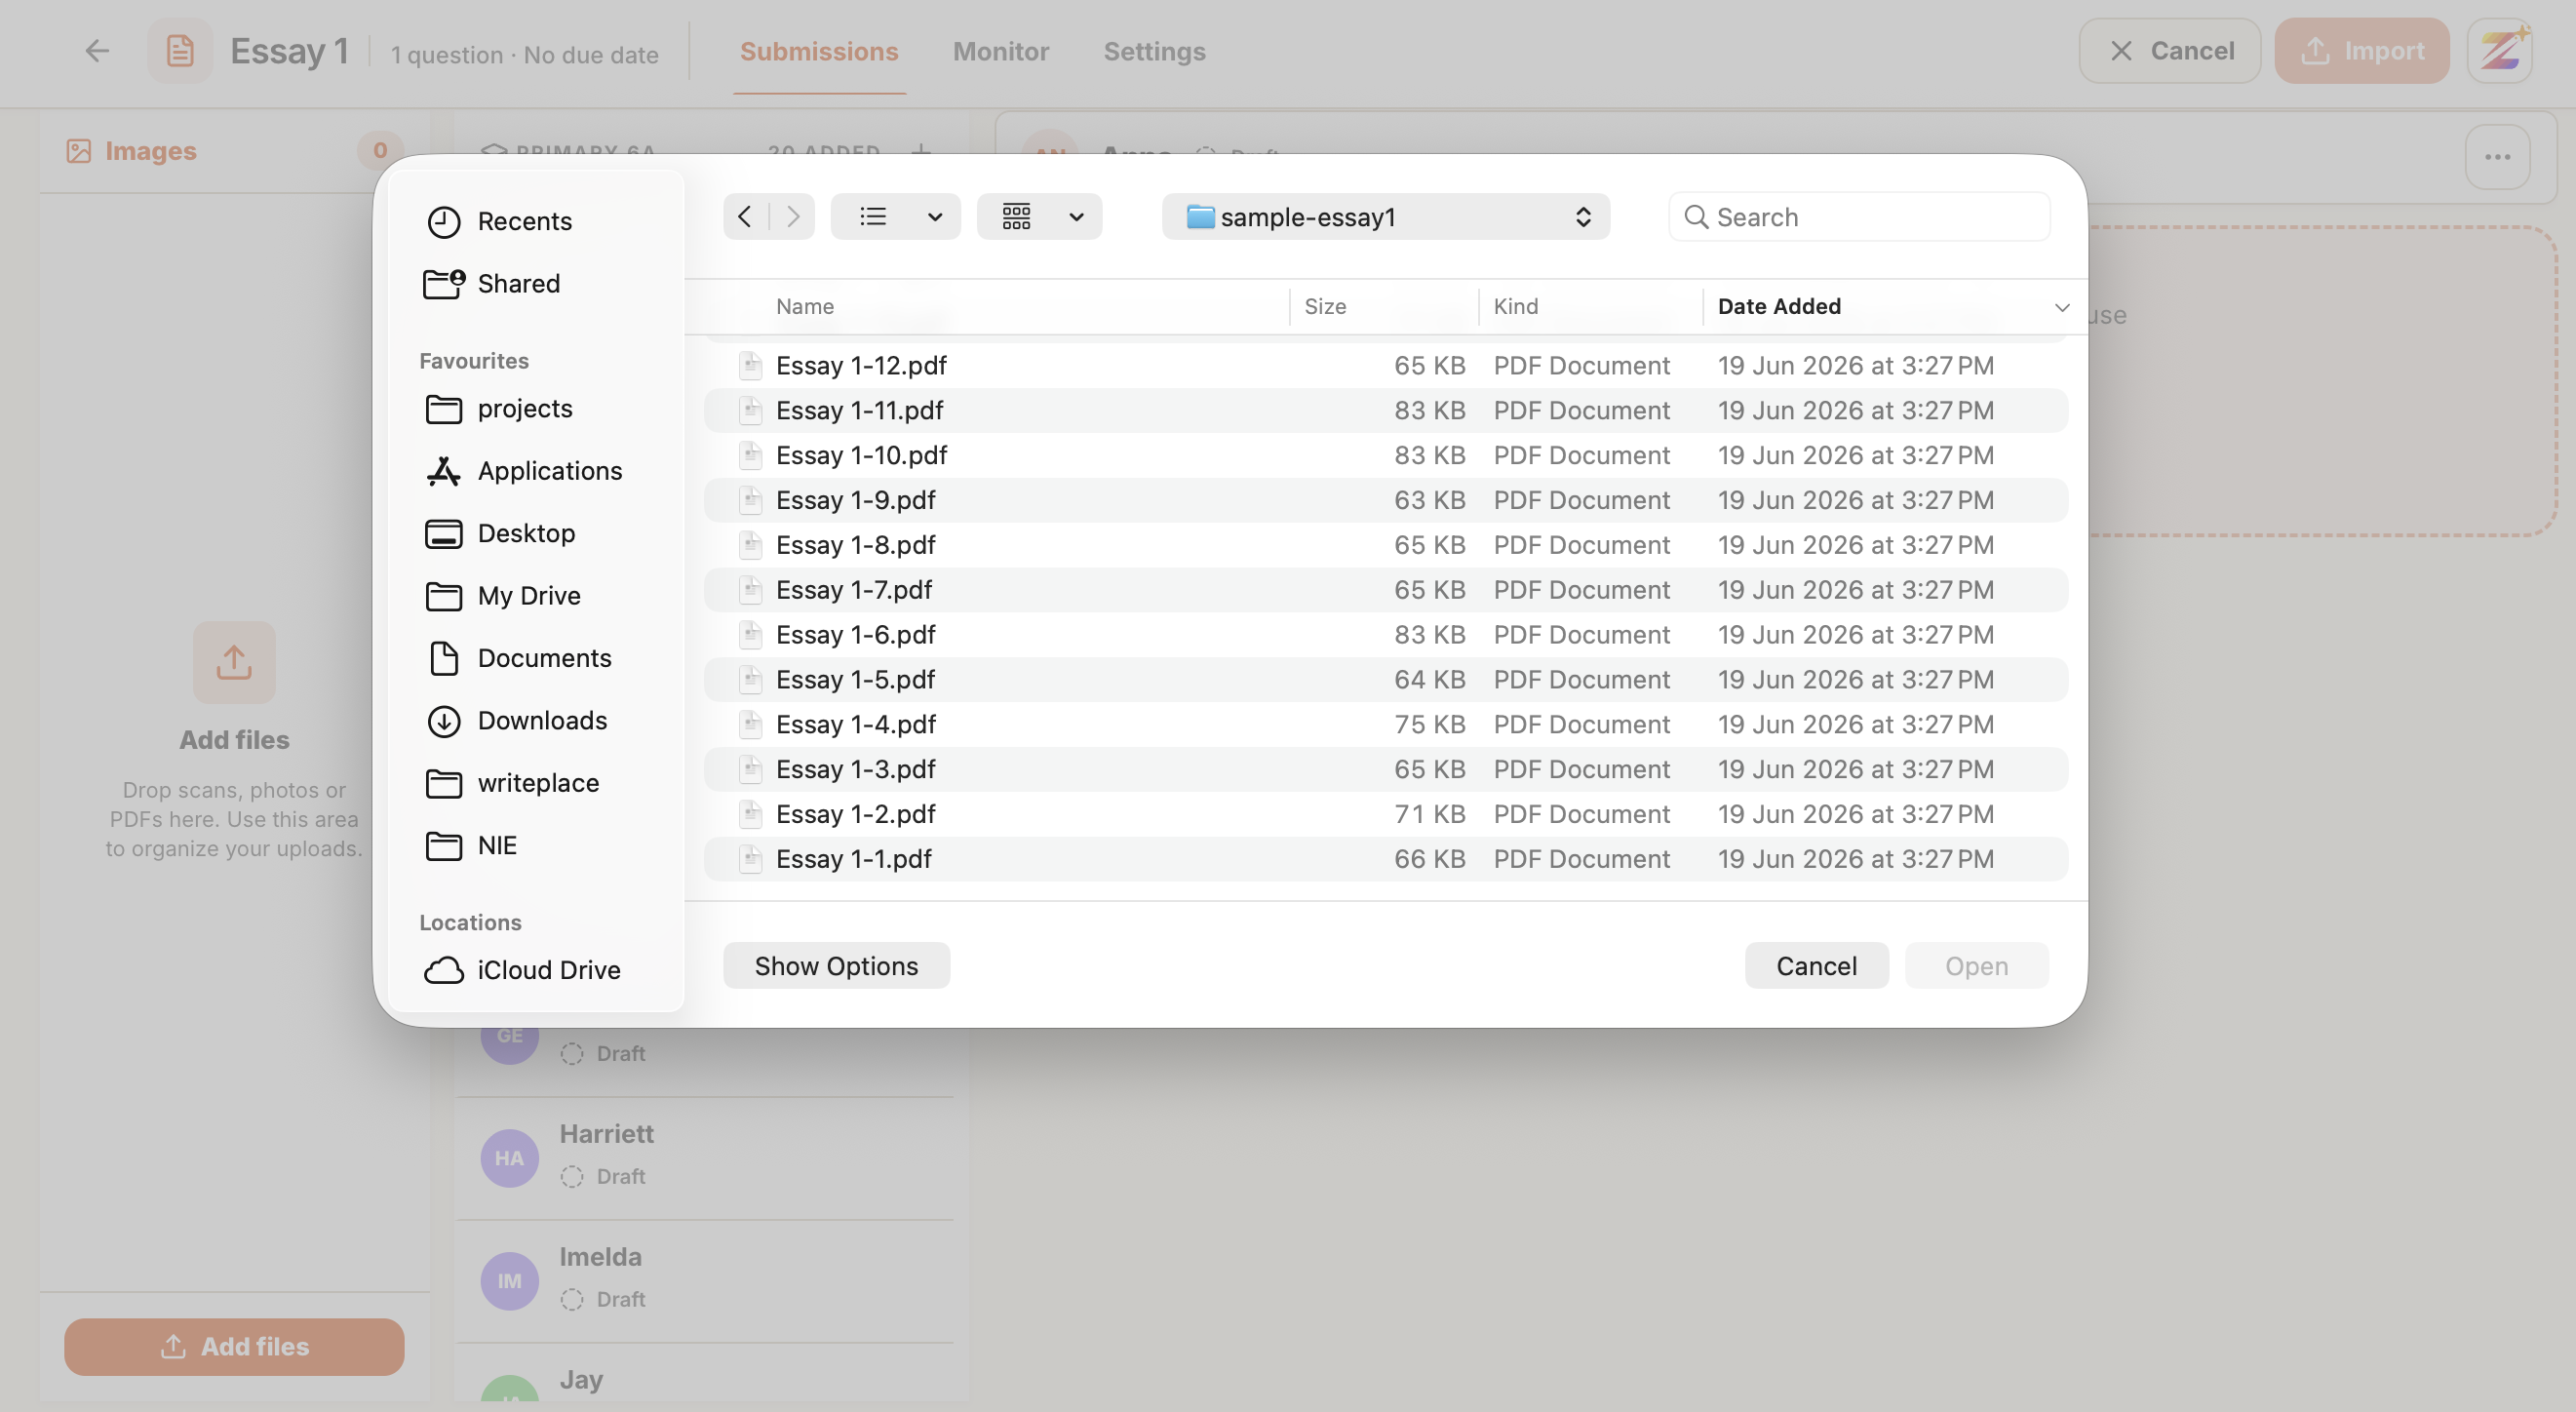 Select the batch of files, and they load into the activity ready to assign.
Then match each file to a student: drag a card onto a name, or use Assign to to pick one. Students can also answer inline if they are working in Zippy directly.
 Drag each uploaded card onto the right student, or let Zippy match them for you.
Handwritten work is transcribed for you
You do not need typed submissions. Upload a photo or scan of handwritten work, and Zippy transcribes it into clean text before grading.
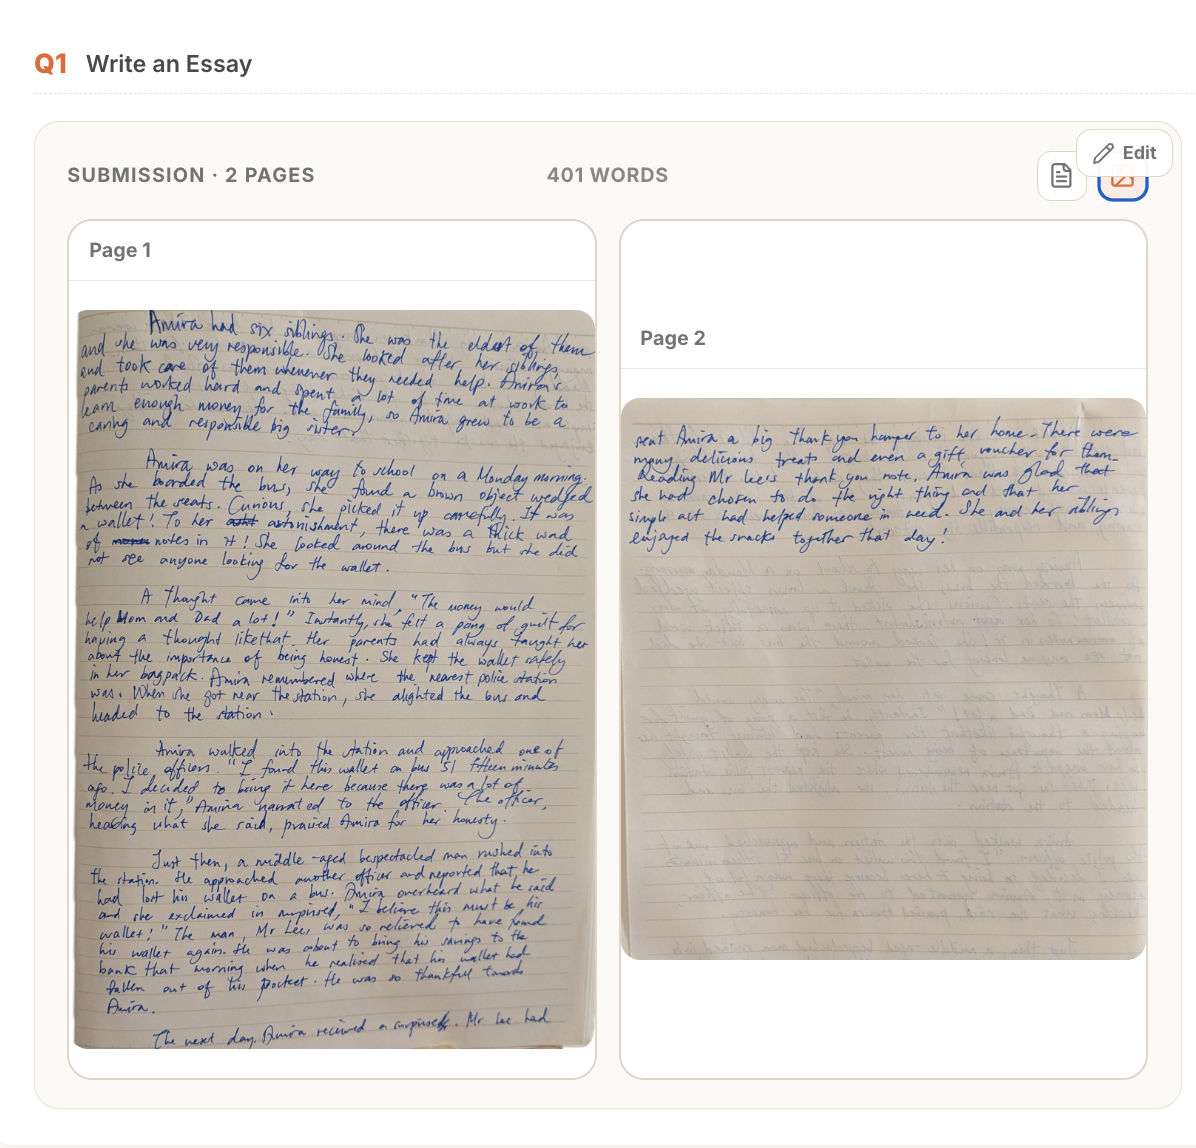 A photo of a handwritten script, uploaded as-is.
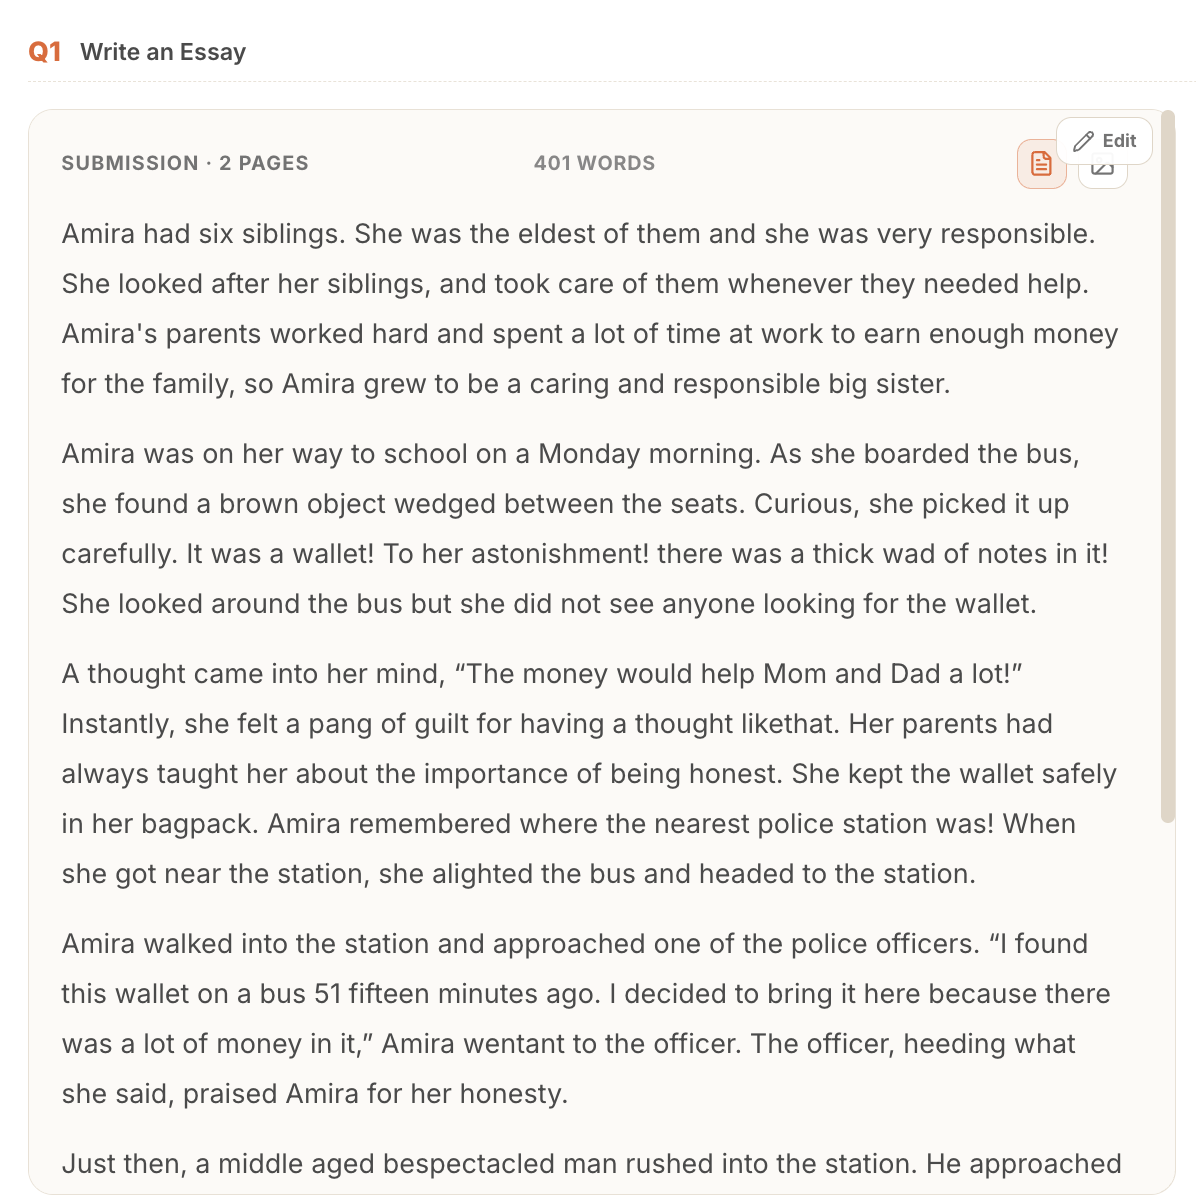 Zippy reads the handwriting and turns it into text, so it grades the same way as a typed piece.
4. Import and grade
Once every submission is attached, each student shows Ready to import. Click Import to process the attached work.
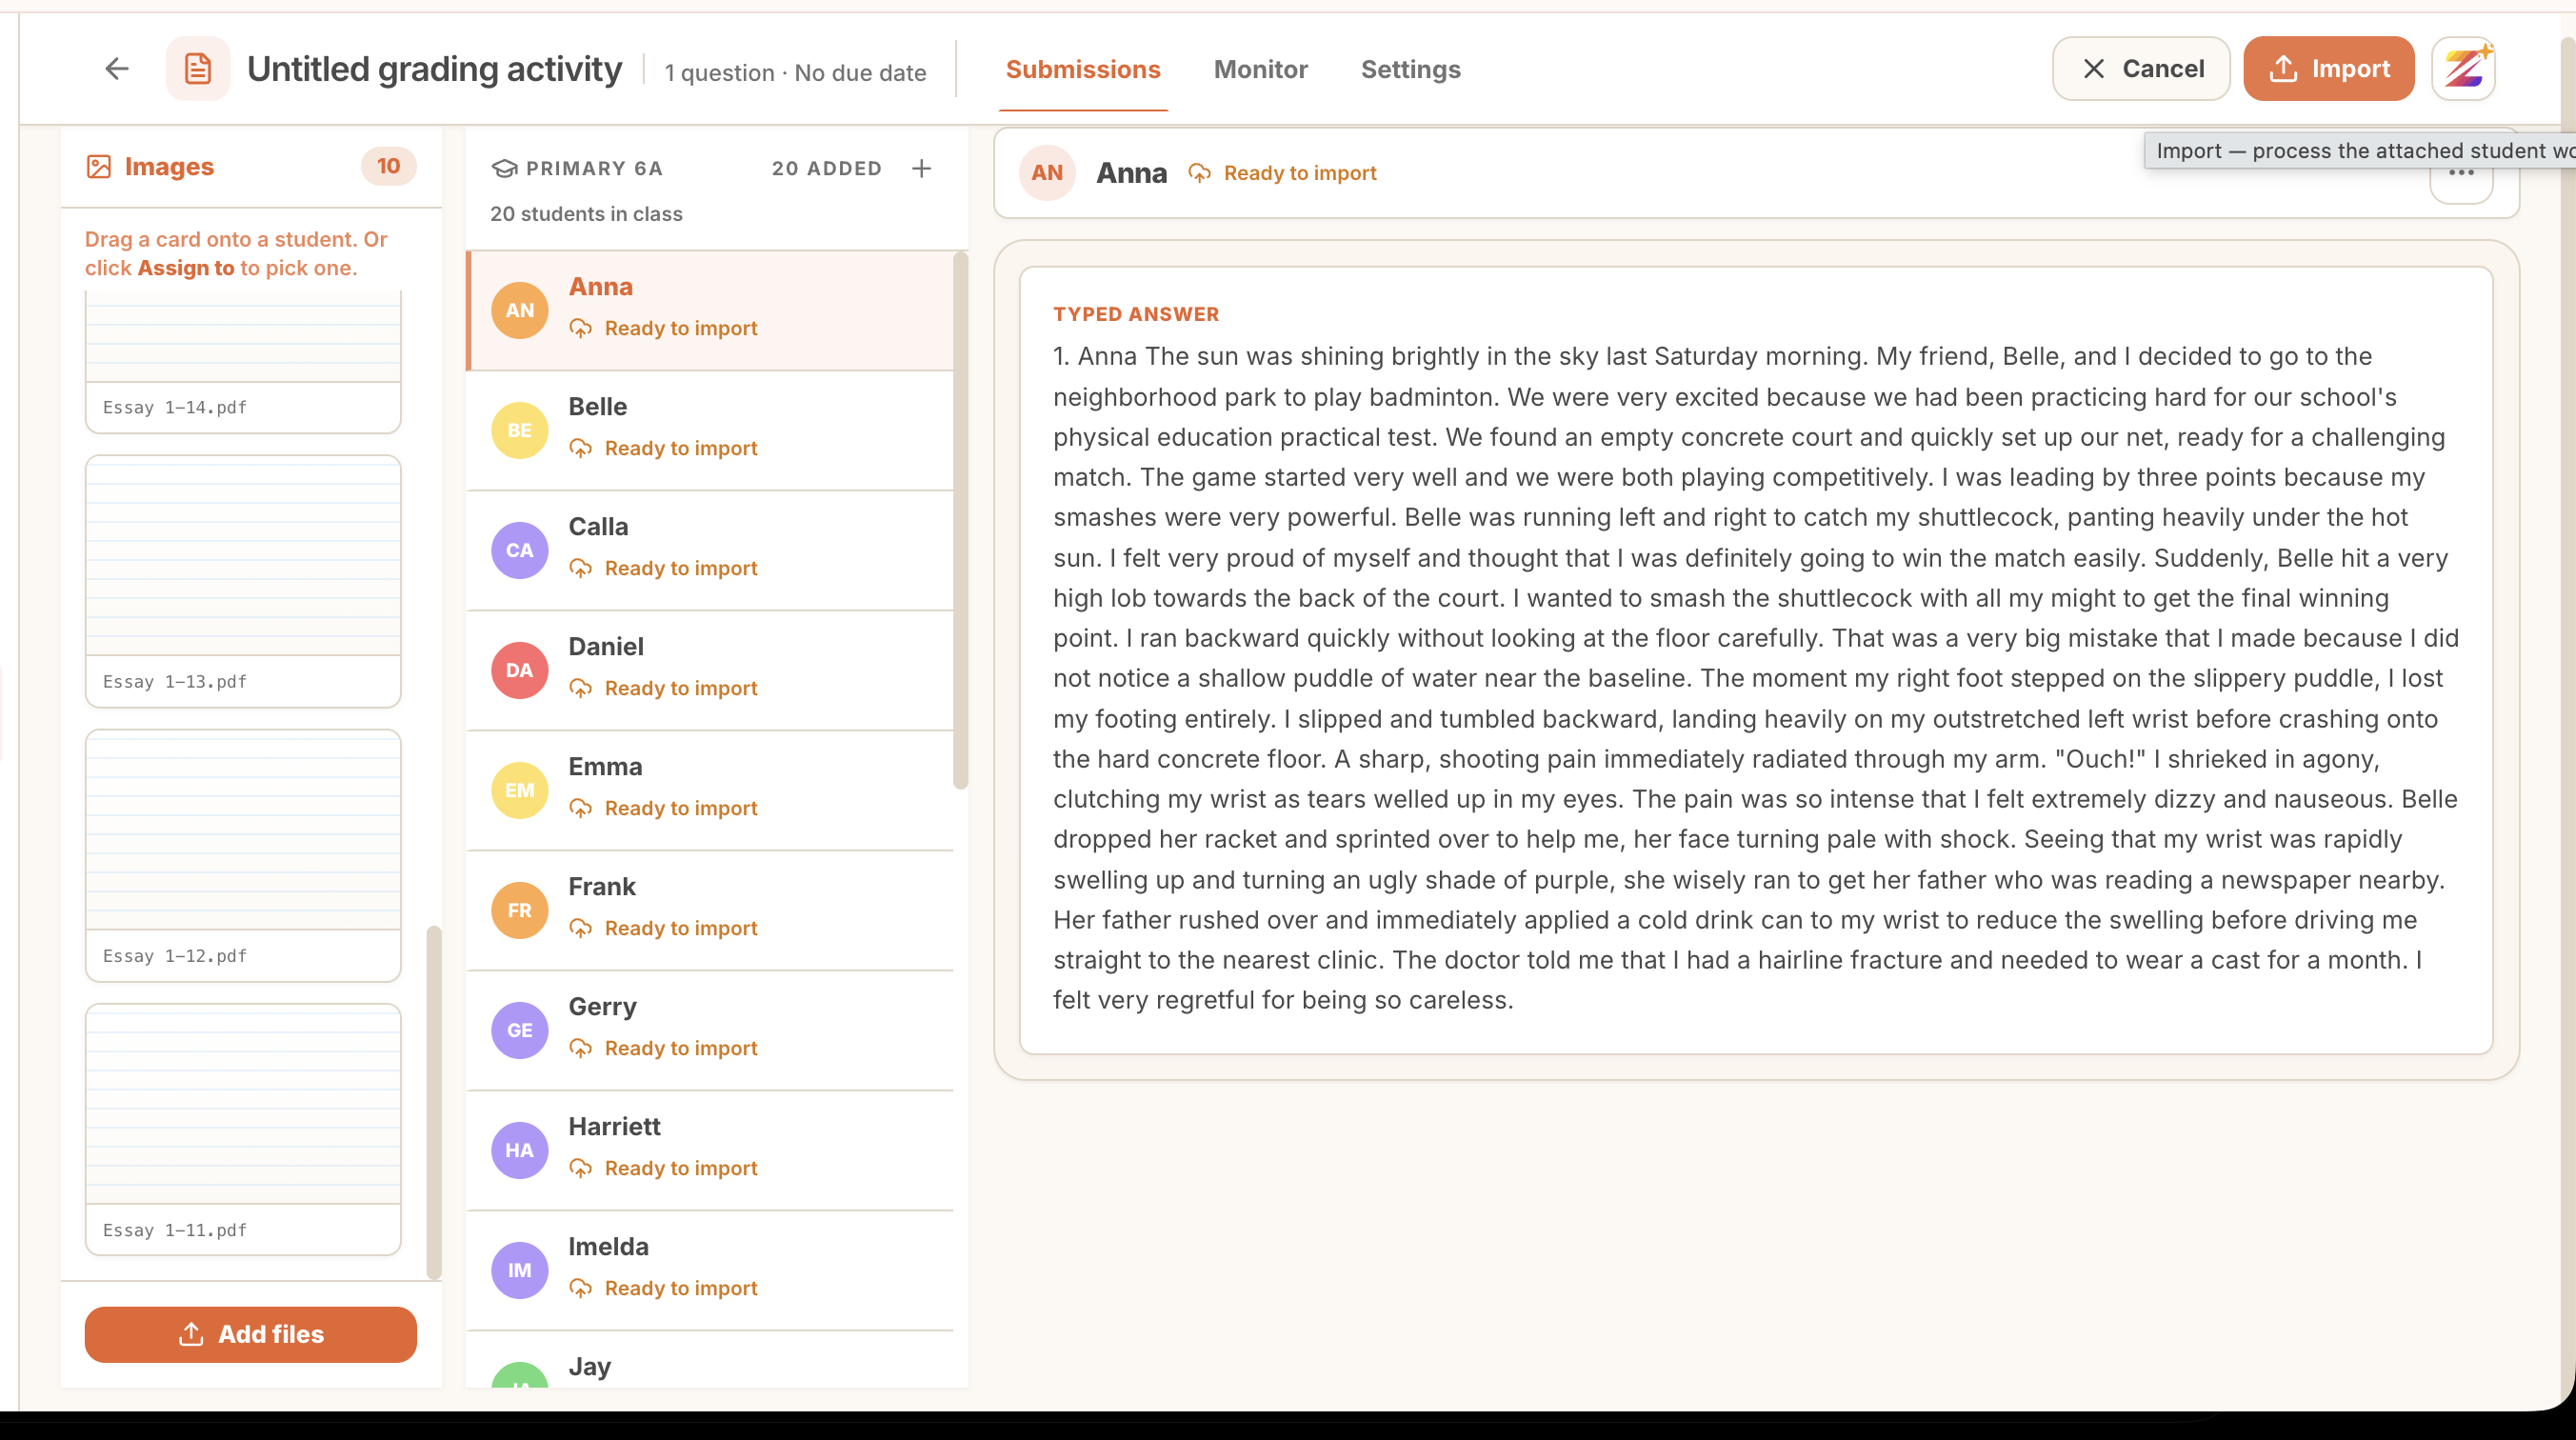 Every attached submission is ready. Import processes them all in one go.
Then Zippy reads each piece against your rubric and drafts feedback for the whole set. You can watch it work through the class.
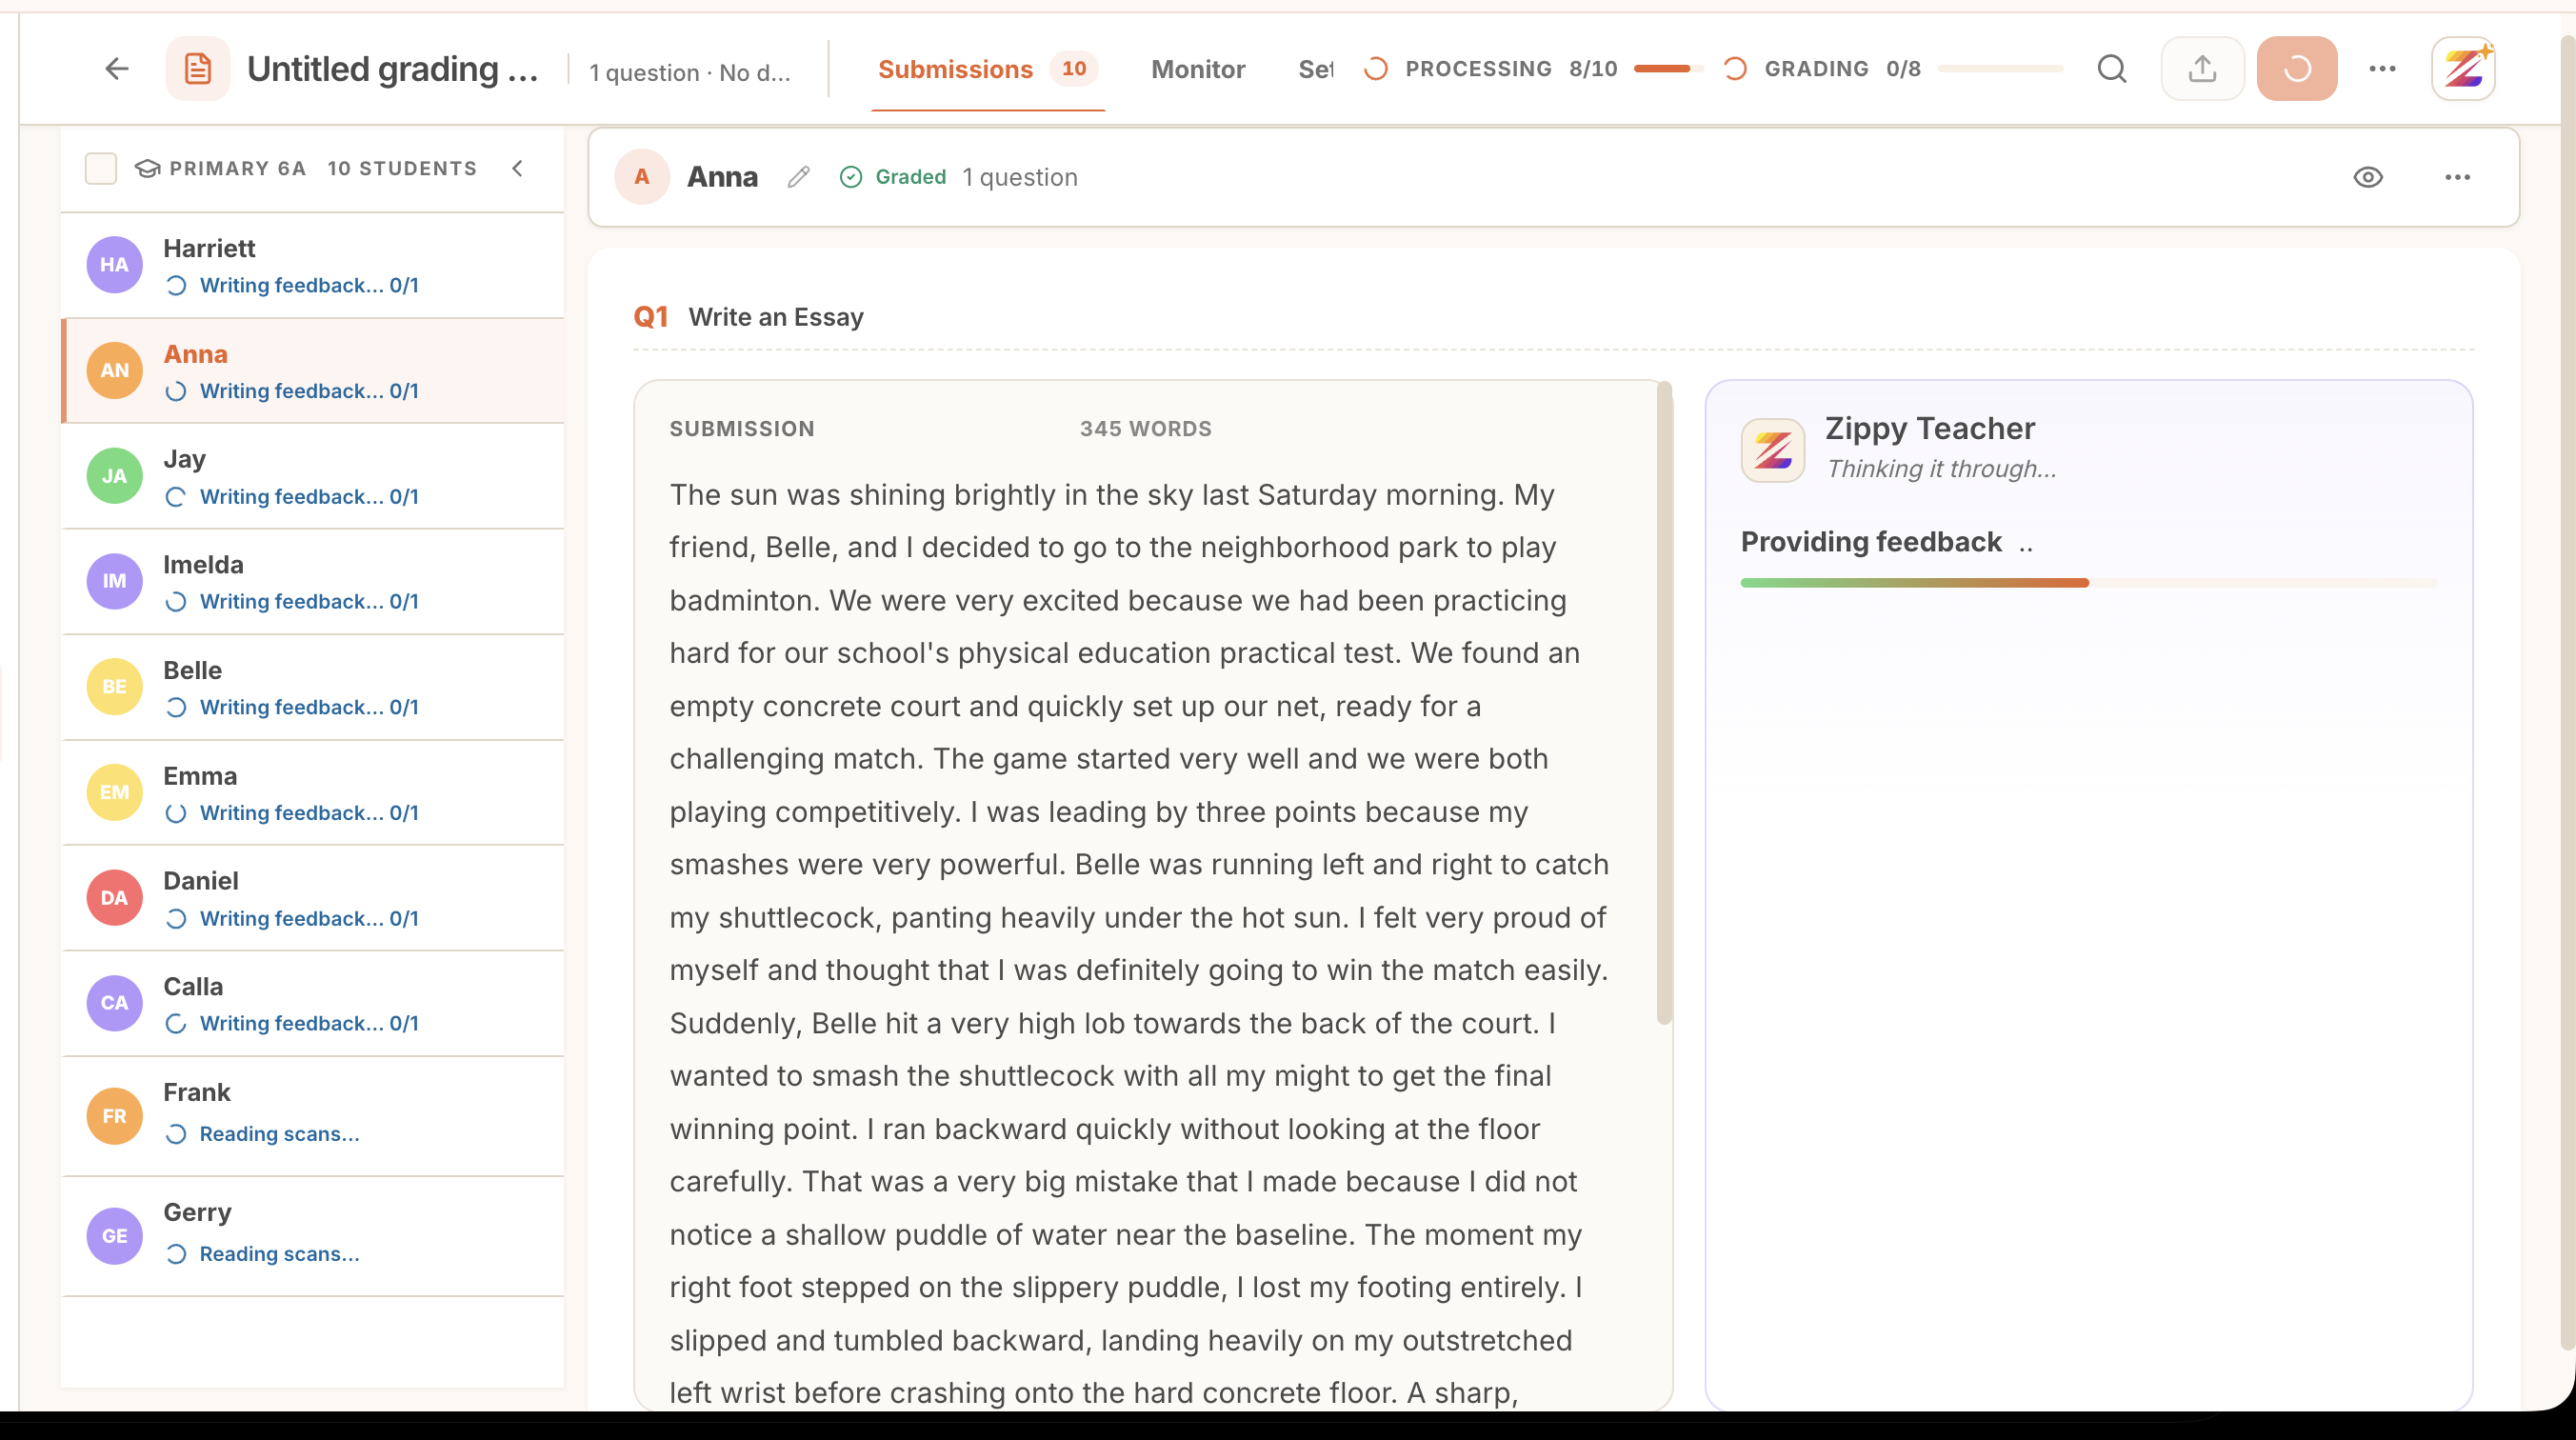 Zippy grades the set in the background. Feedback and scores appear as each student is done.
5. Read what Zippy gives you
For every student, Zippy produces a full evaluation: a warm, student-facing comment, a score against each rubric criterion, and a total. It shows which rubric it graded against, and you can play the feedback aloud with Listen.
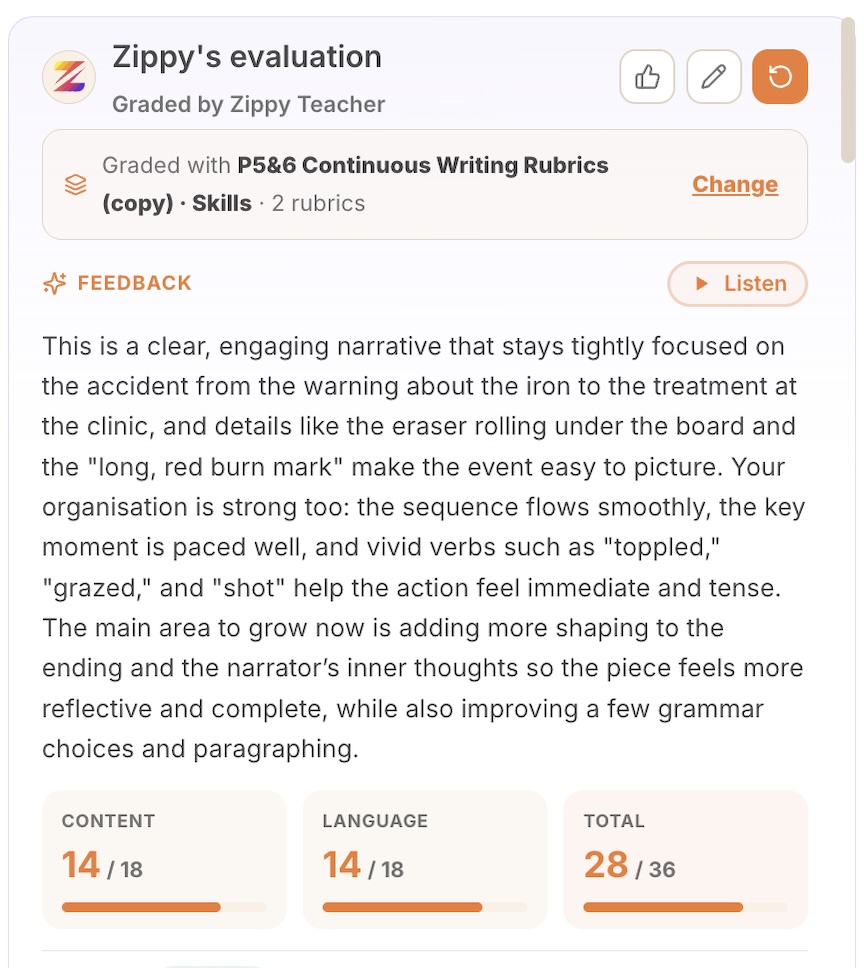 A written comment plus scores for each category, grounded in the rubric you chose.
Open the skills breakdown to see exactly where each mark came from, criterion by criterion, each with a band and a short reason.
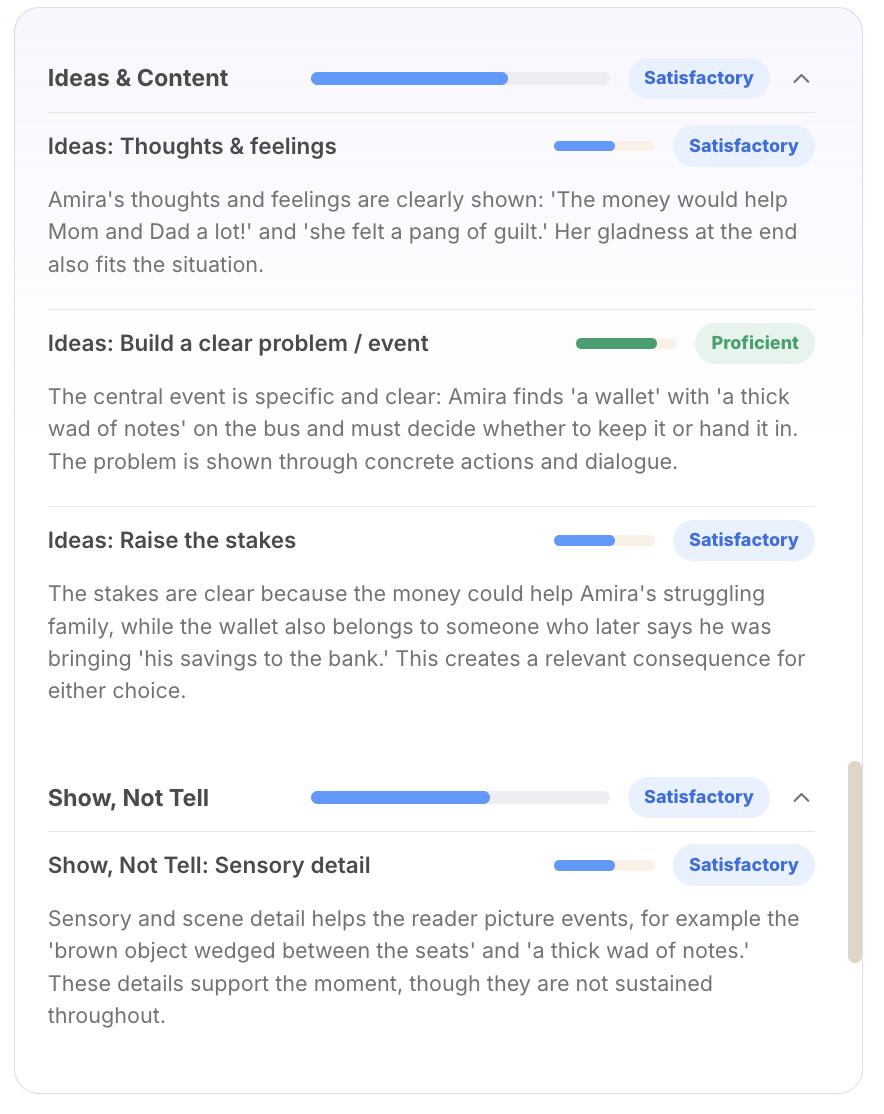 Every skill is scored and explained, so the grade is never a black box.
Zippy also annotates the writing itself, marking the exact words or phrases that need attention and suggesting a fix, for example a grammar or tense correction.
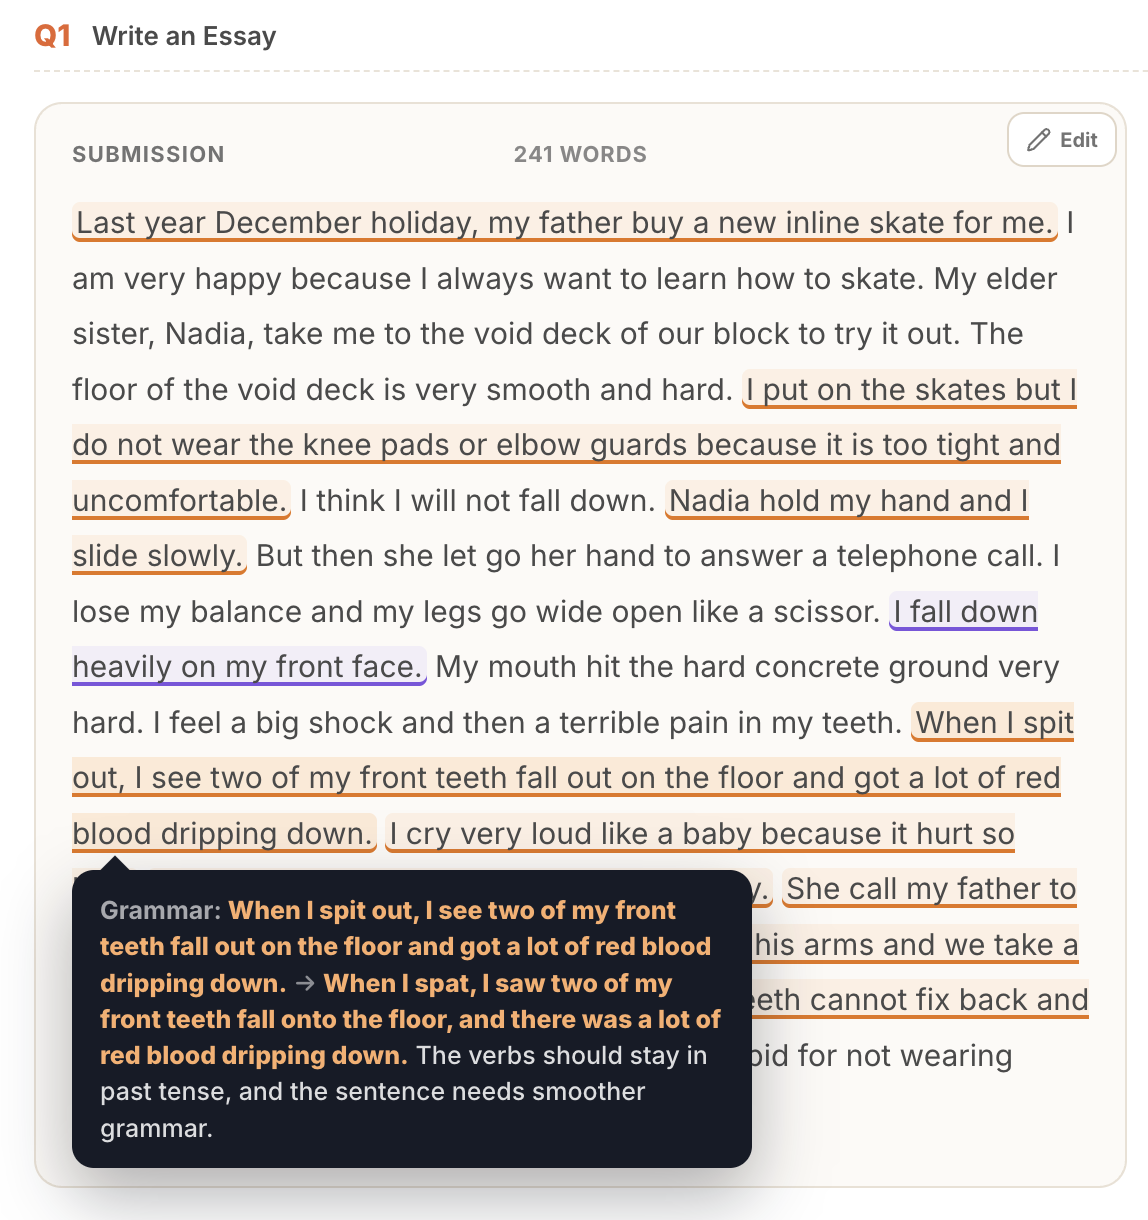 Notes on the student's exact words, with a clear before and after.
6. Adjust anything, you stay in control
Everything Zippy drafts is editable. Click any section to change the wording, nudge a score up or down, or change a band. Add the sentence only you would write because you know this student. Your edits are what the student sees, and students can never edit the feedback themselves.
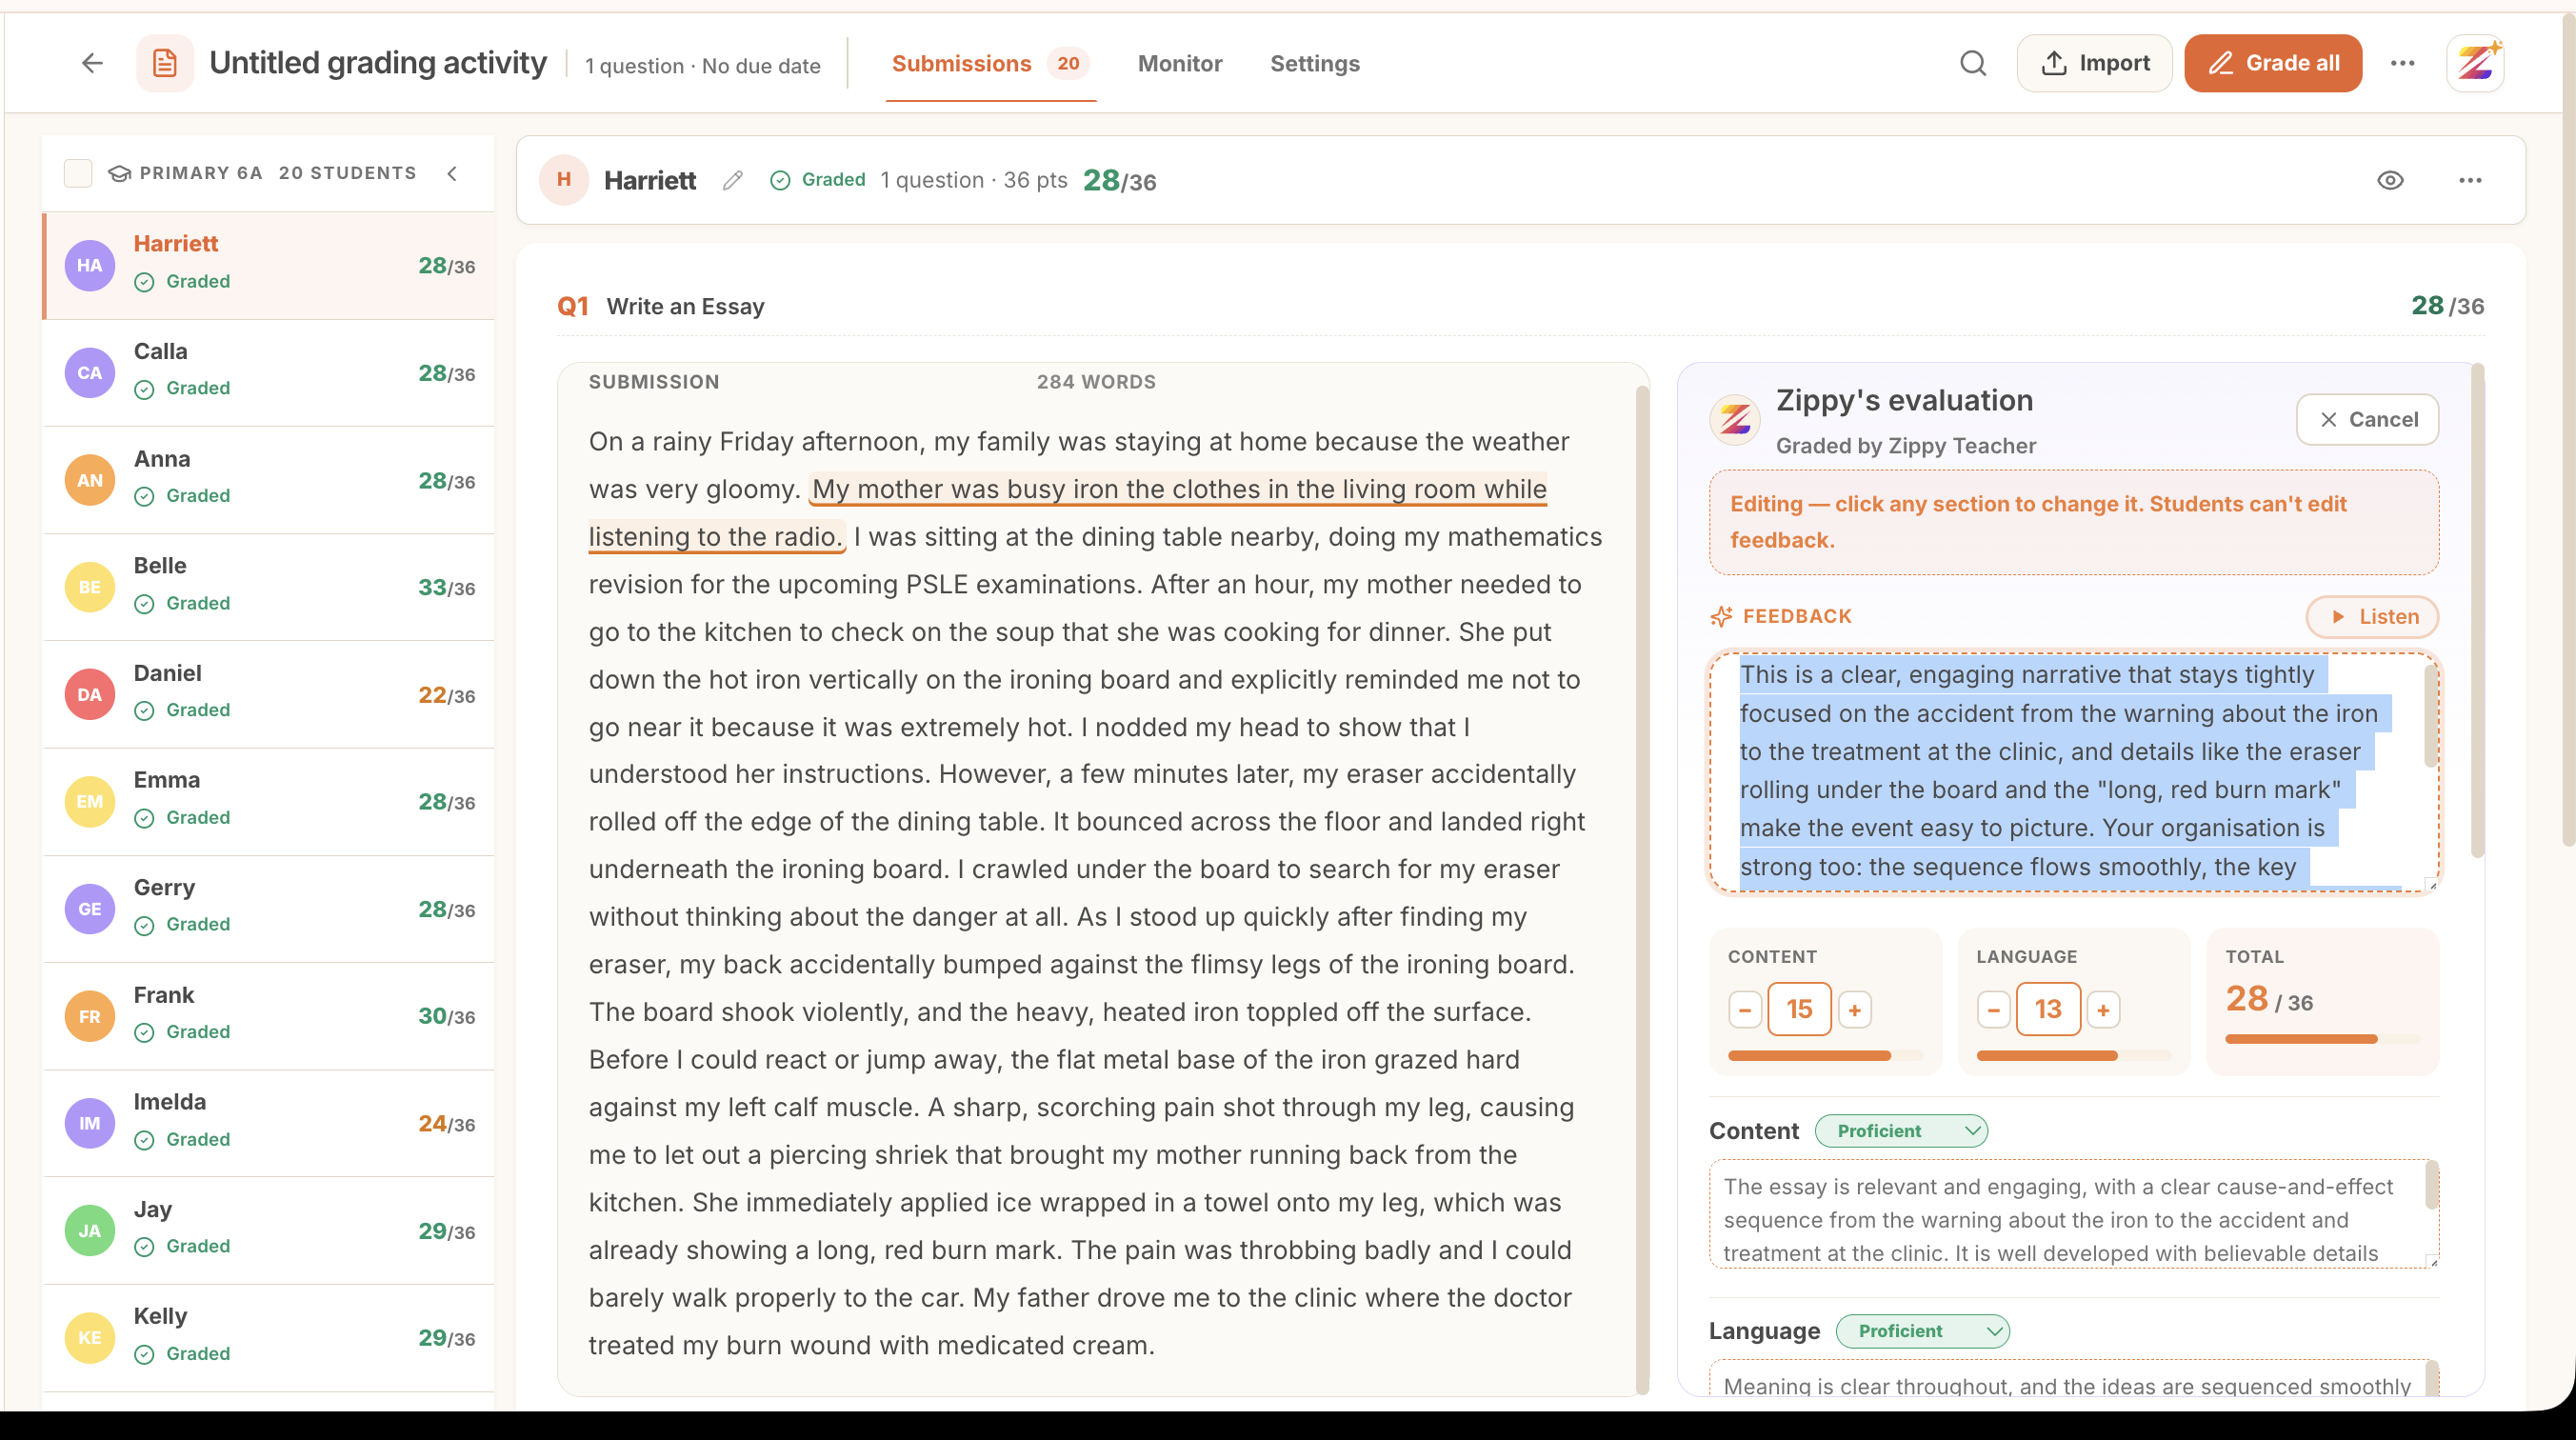 Click any part of the evaluation to edit it. Scores, bands, and comments are all yours to change.
7. See the whole class
Switch to the gradebook to see the set at a glance: who is done, the class average, and every score, with weaker results flagged so you can spot who needs another look.
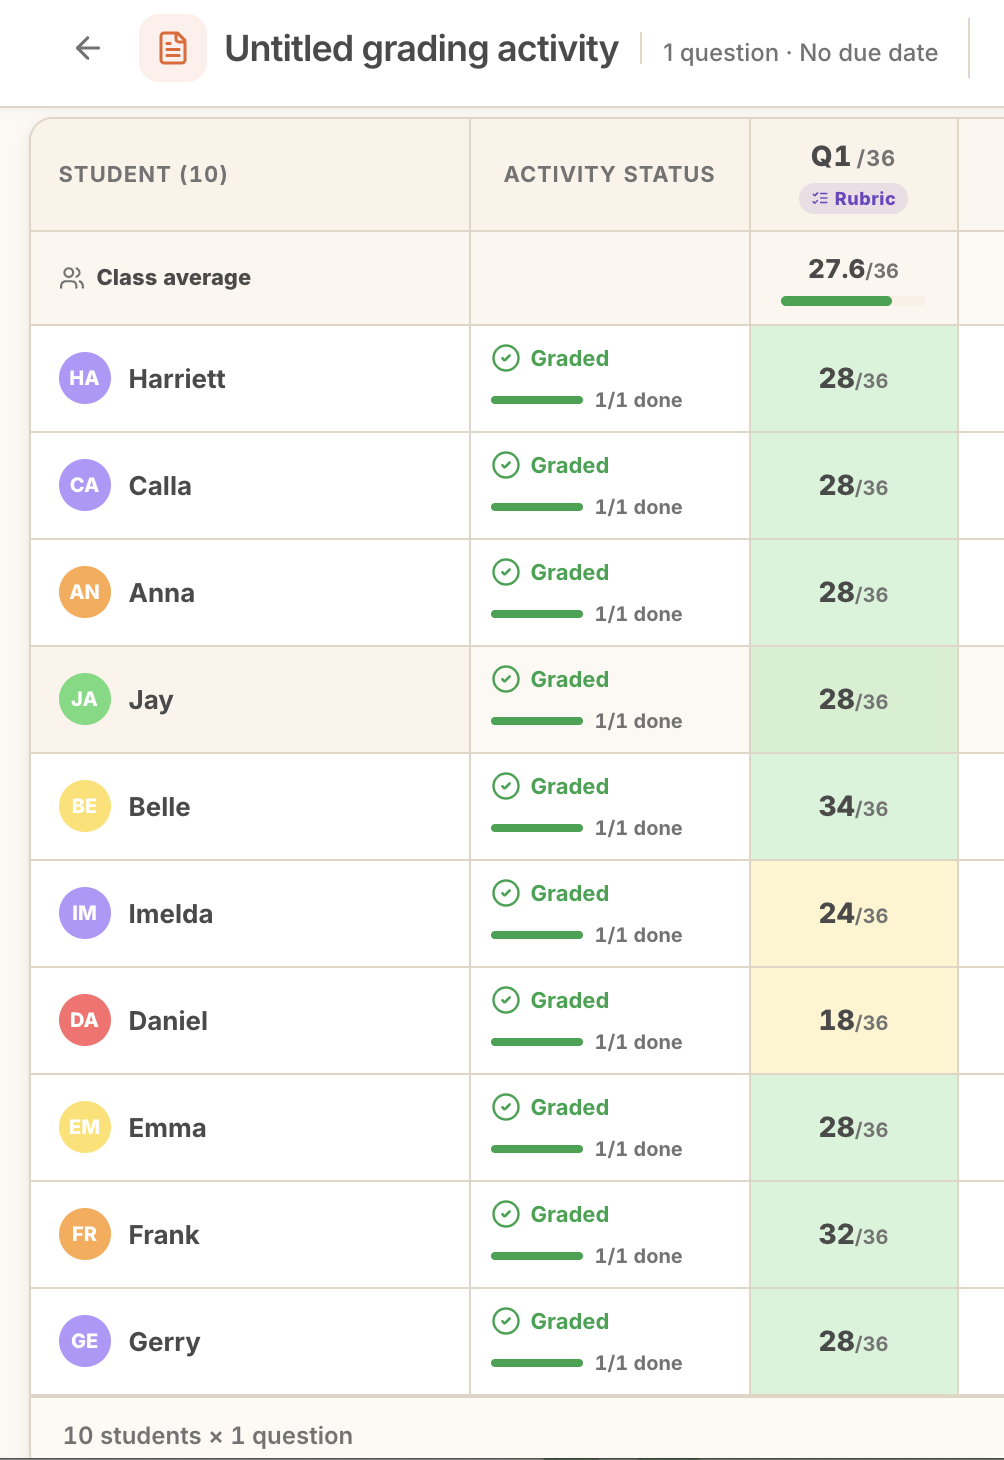 The whole class in one view, with the average and lower scores surfaced.
8. Export reports
When you are happy, export the results. Open the activity menu and choose Export all, or select specific students first.
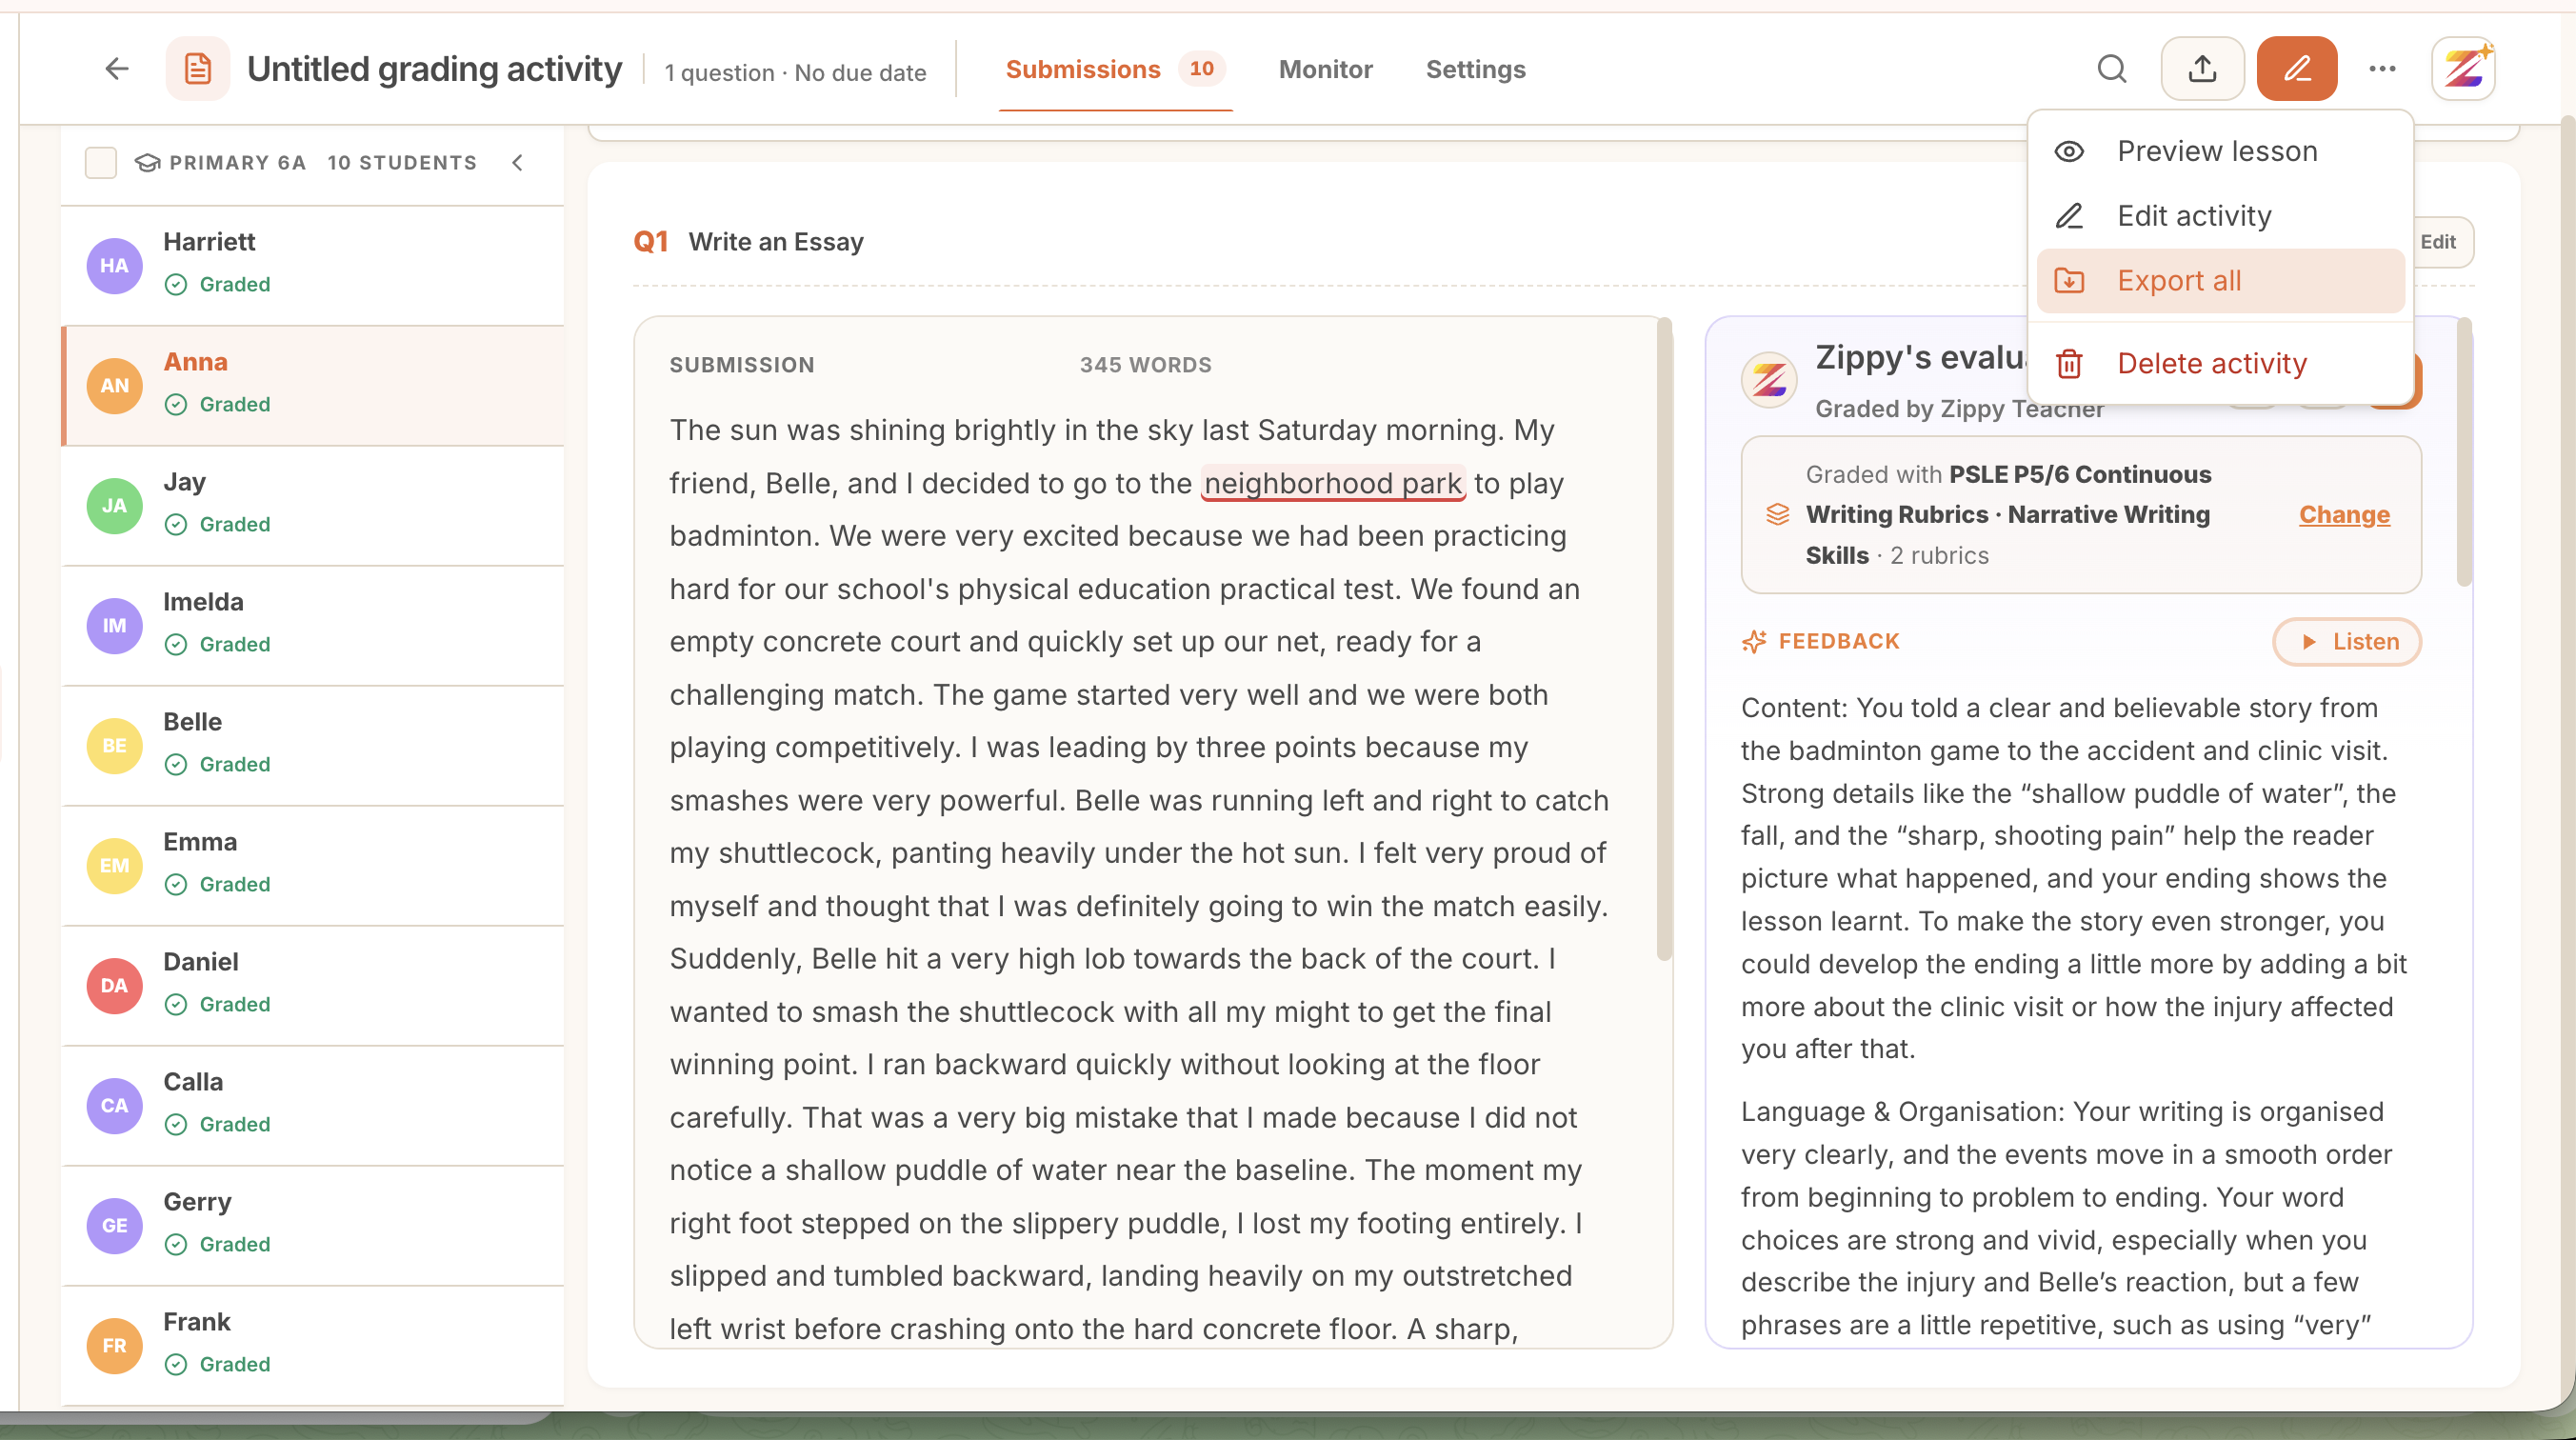 Export the whole set, or just the students you have selected.
Choose your format (PDF, Word, or Markdown), pick what to include (the grading report and optional skill details), and whether to produce one combined file or a separate file per student.
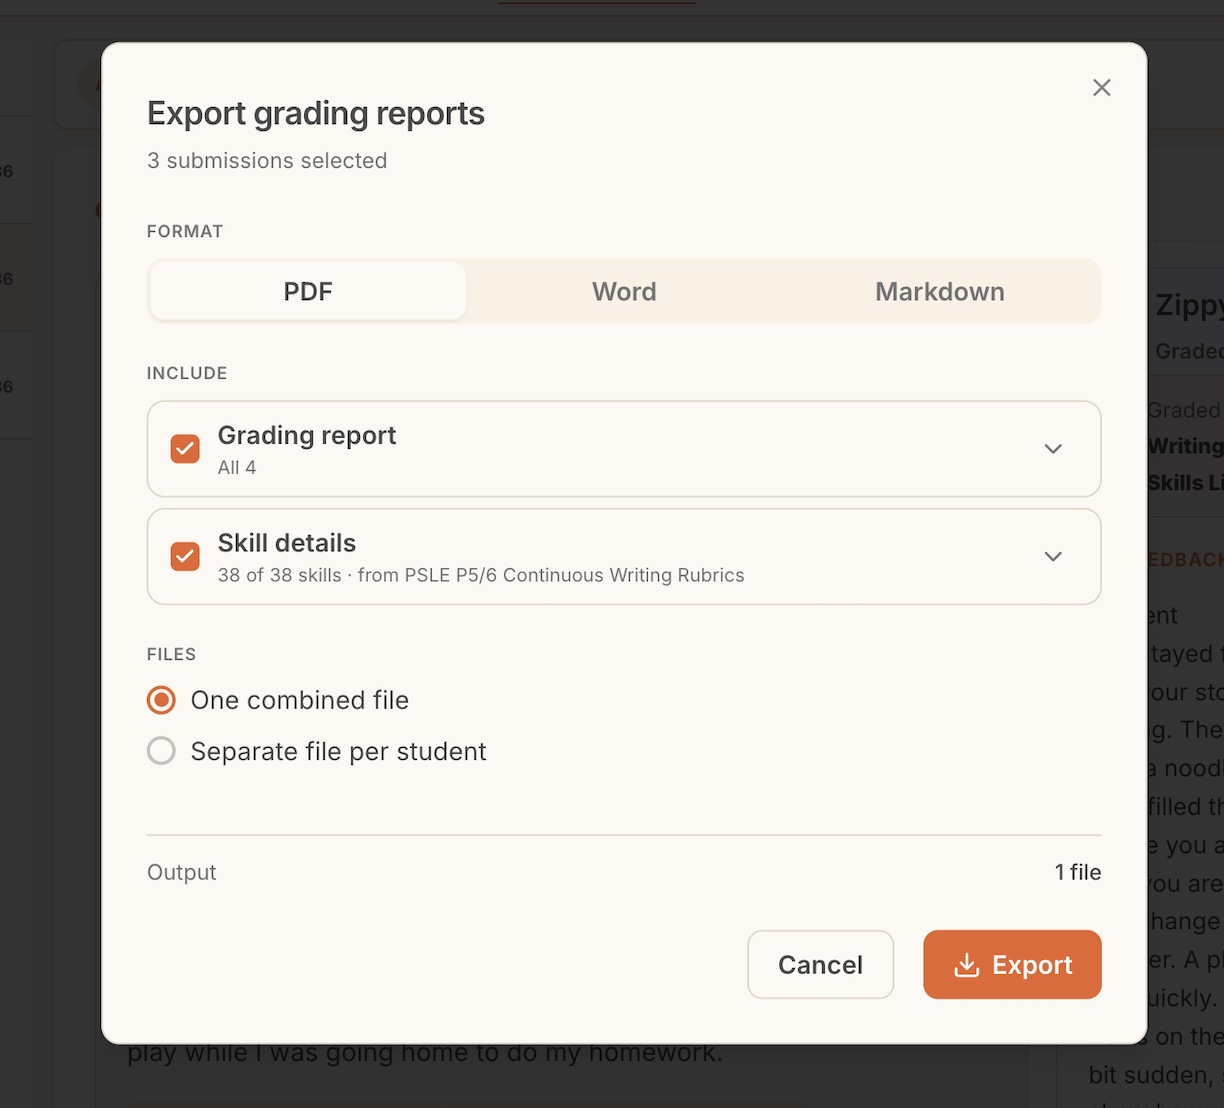 Export as PDF, Word, or Markdown, combined or one file per student.
If you include skill details, you can choose exactly which skills appear in the report.
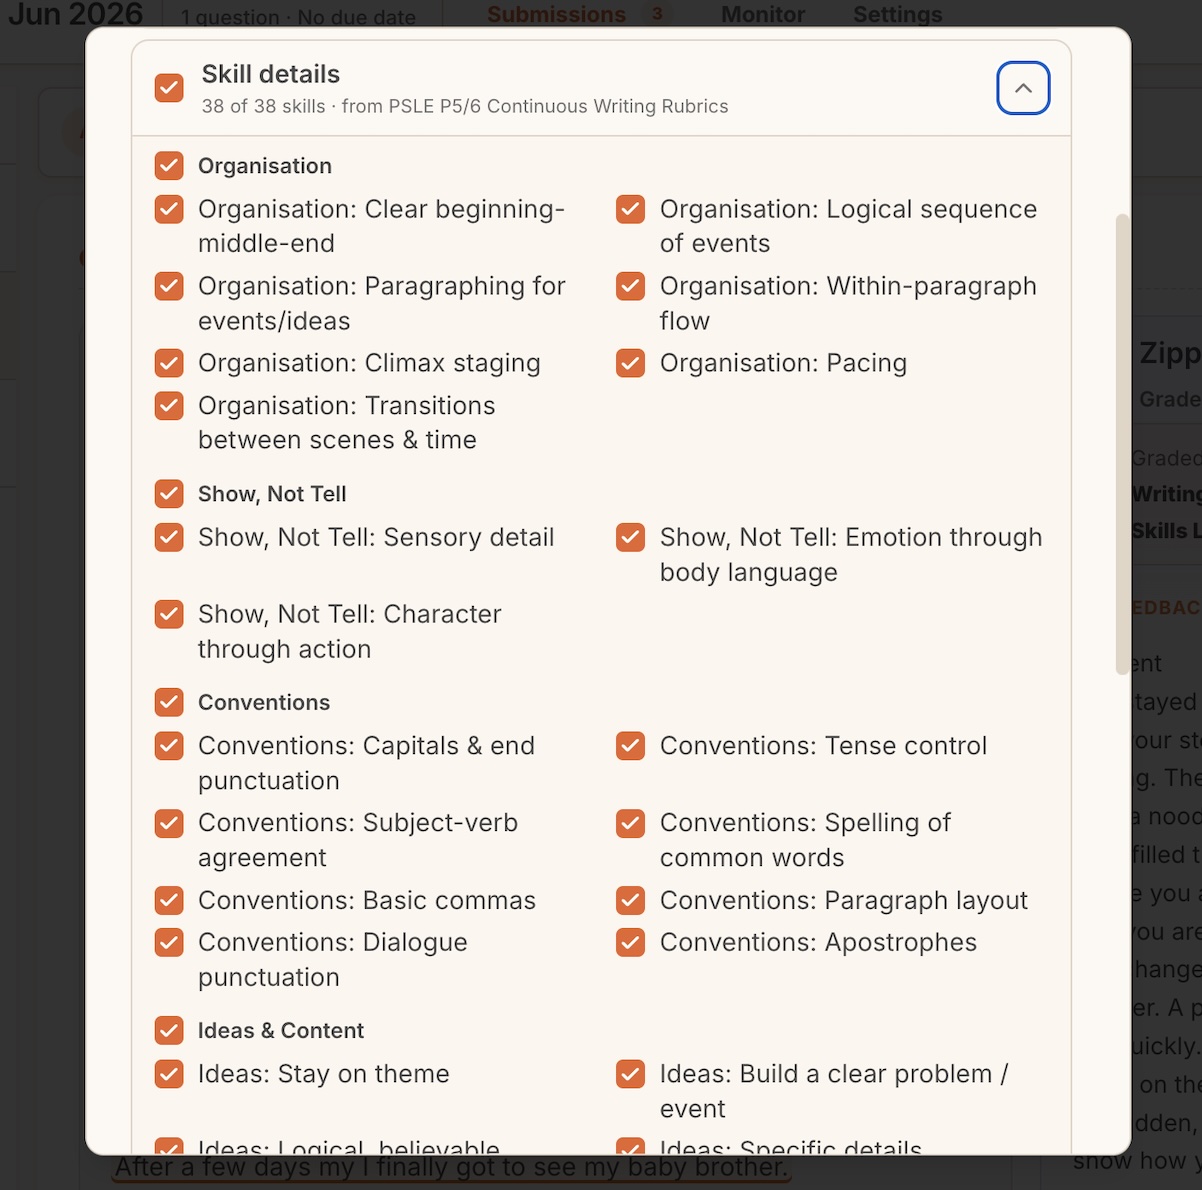 Include the full skill breakdown, or narrow it to the skills you are focusing on.
The result is a clean, parent-ready report for each student, with scores, feedback, and next steps.
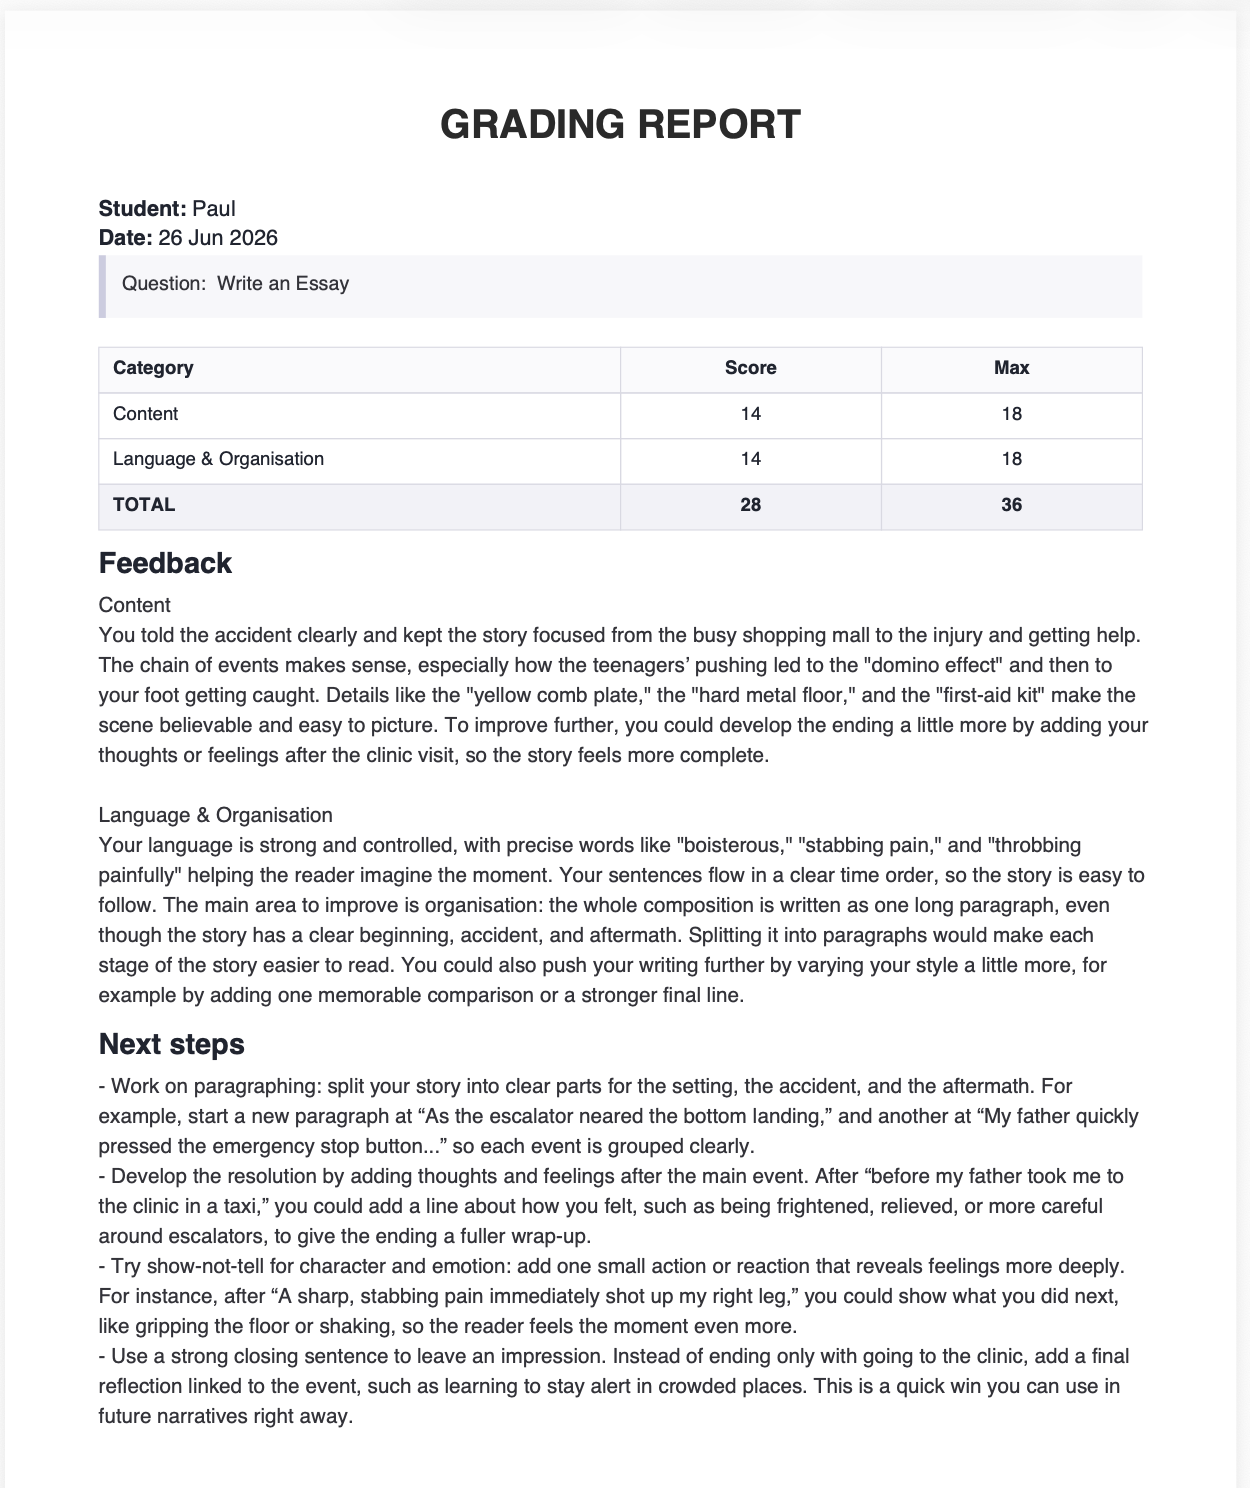 A finished report: category scores, feedback, and concrete next steps.
If you included skill details, they come through as a clear table of every skill, its band, and a comment.
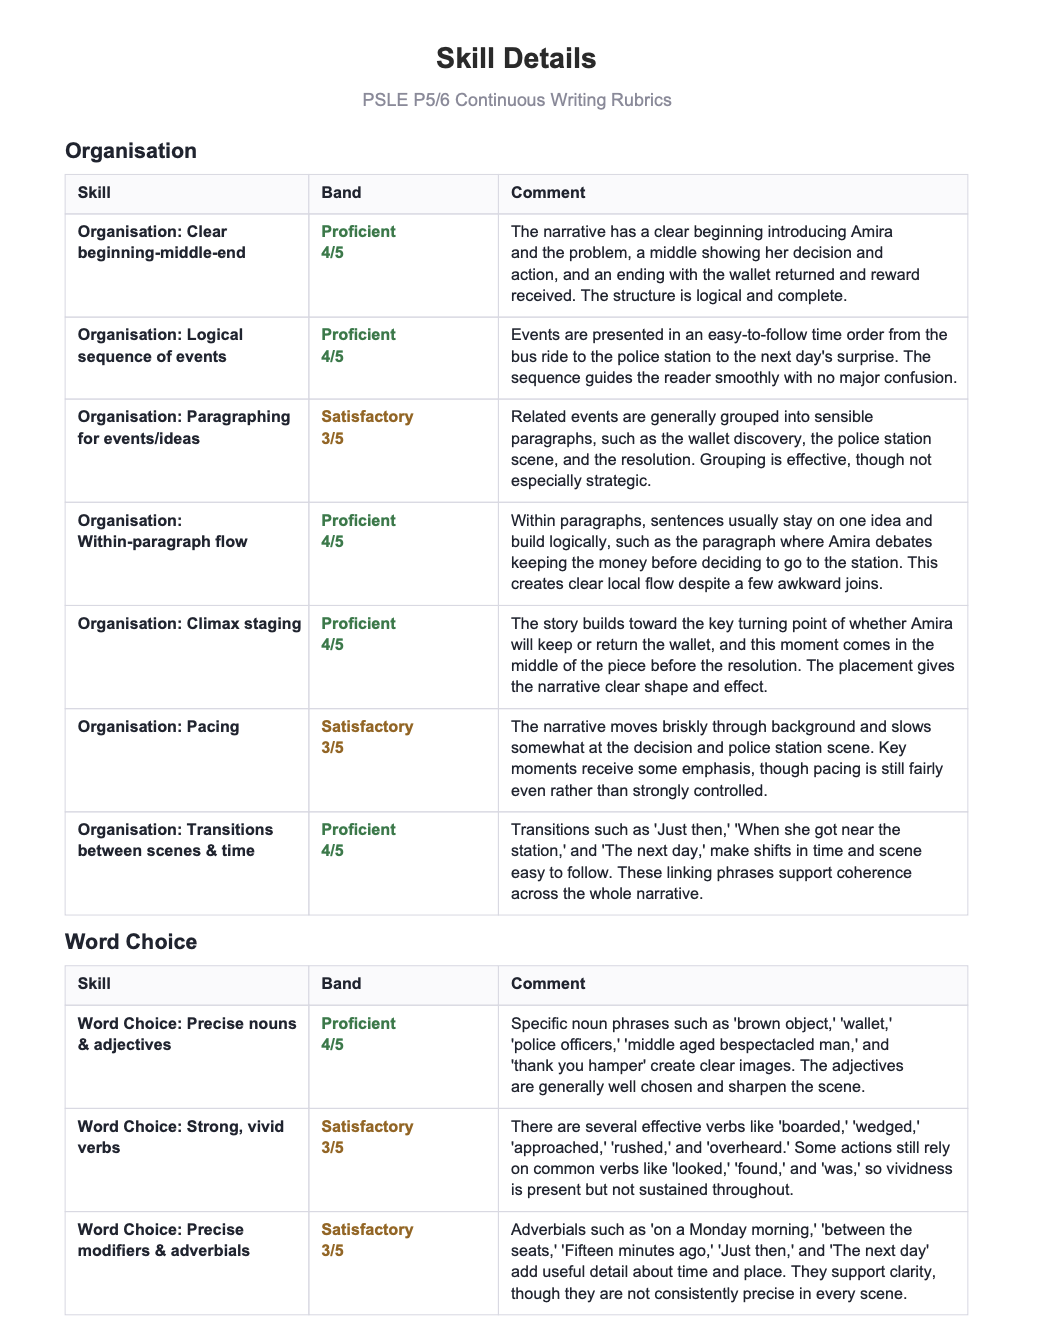 The skill-by-skill breakdown, exported alongside the report.
What's next
After a few sets, your gradebook starts surfacing patterns across the class. We will cover reading those patterns in an upcoming guide.